Event scheduling
How do I schedule an event?
Log in to your account and click on Create a webinar or Create a meeting. Choose the type of the event that you would like to schedule. You can learn more about the event types here.

Enter the room name. For time-scheduled events, click the calendar icon next to Date to set the event date and time. Make sure the time zone setting is correct.
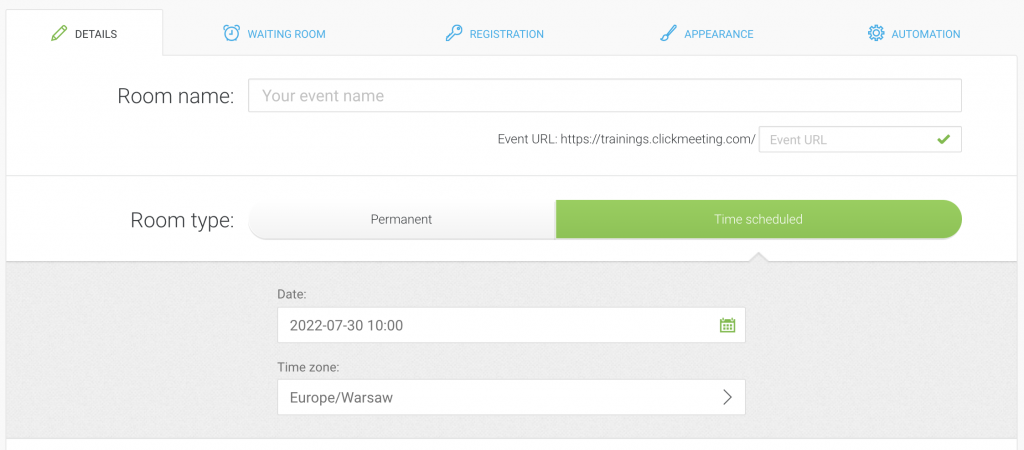
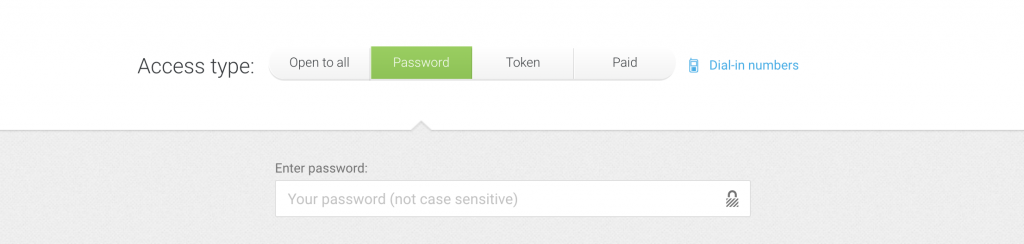
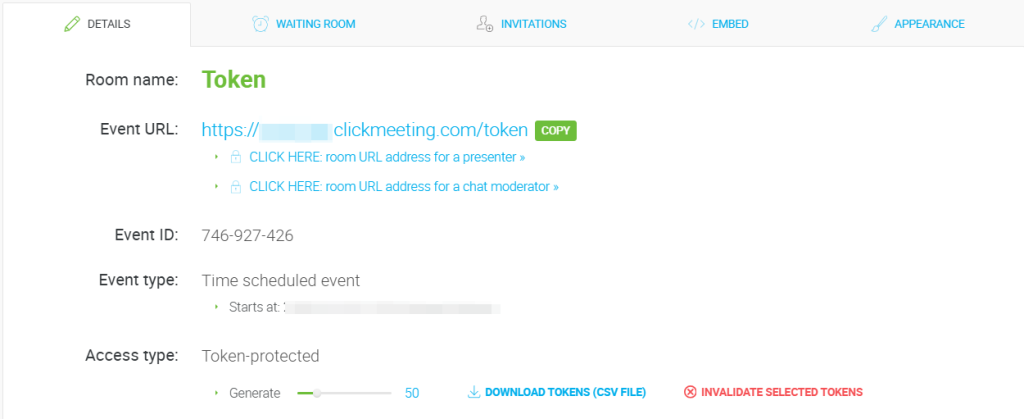
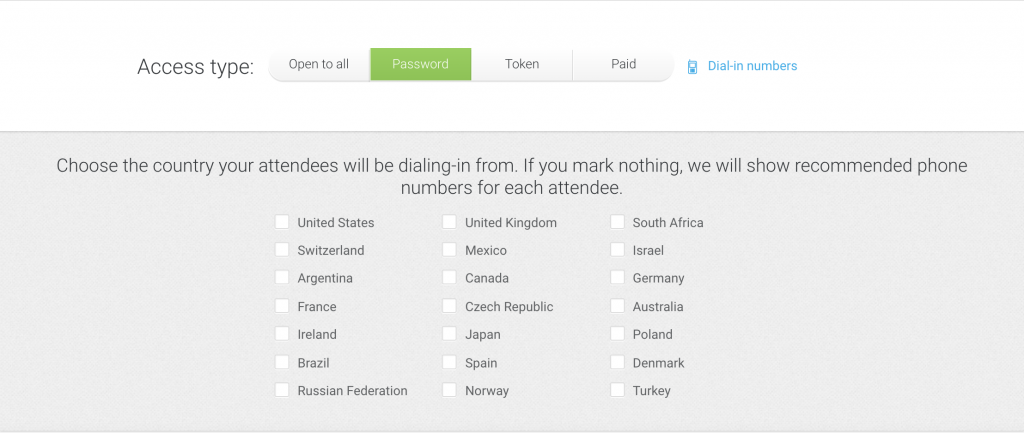
Next, choose the Access type. You can create events that are Open to all, Password protected, or Token protected. When logging in to token-protected meetings, attendees need individually assigned tokens which are sent automatically with invitations.
You can deactivate tokens after they have already been sent, which will prevent a specific token from being used to access the event. If the tokens were sent out with invitations from the ClickMeeting platform, the list of downloaded tokens will also include the email address to which they were assigned. The attendee will receive a message about an invalid token when trying to log in.
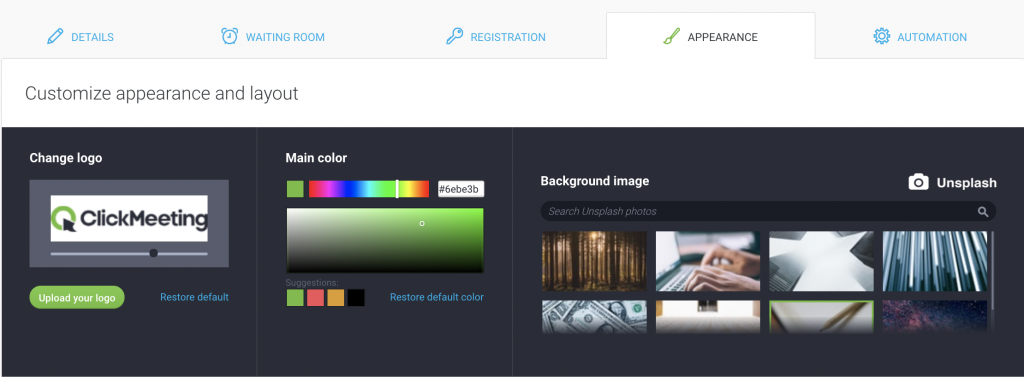
In the Appearance and Waiting room tabs, you can change the layout and branding of your webinar and waiting rooms, as well as the agenda and the lobby message displayed to attendees while they wait for the event to start.
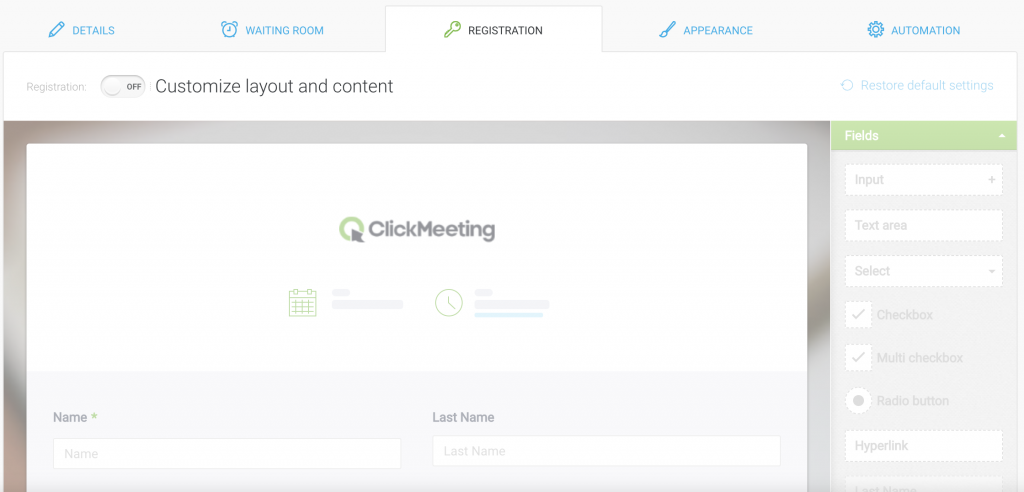
If you enable Registration for your event, you’ll know in advance how many people would like to attend it. To capture additional information, go to the Registration tab and choose the details you require.
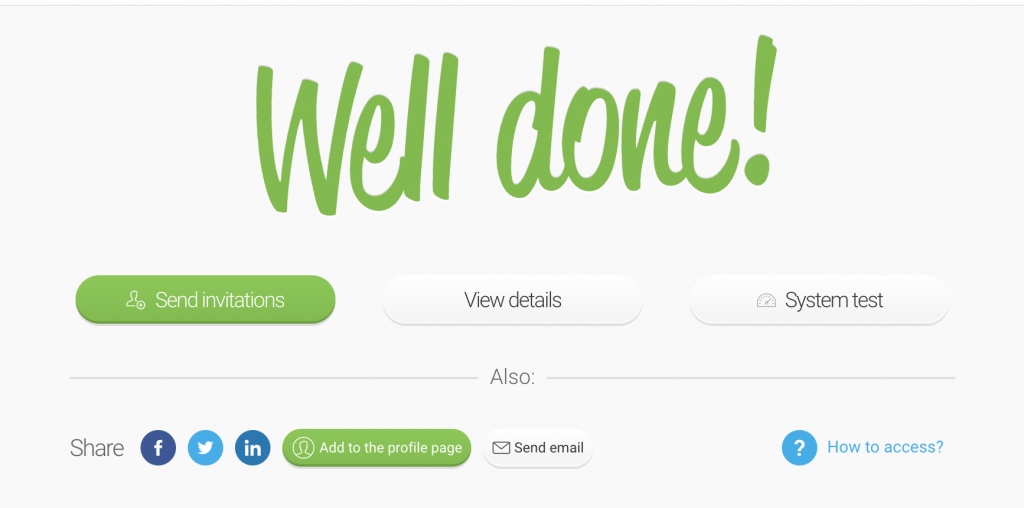
After choosing your settings, don’t forget to Create and invite.

You can now proceed to sending invitations. Use the ClickMeeting Invite feature or copy the event details, including the event URL, and send them over to your attendees.
If you send Outlook invitations to your ClickMeeting events, the ClickMeeting plugin for Outlook is worth checking out! It allows you to schedule meetings and invite participants directly in Outlook with just a few clicks. Watch this quick tutorial to learn how to install and use the plugin.
How do I reschedule an event?
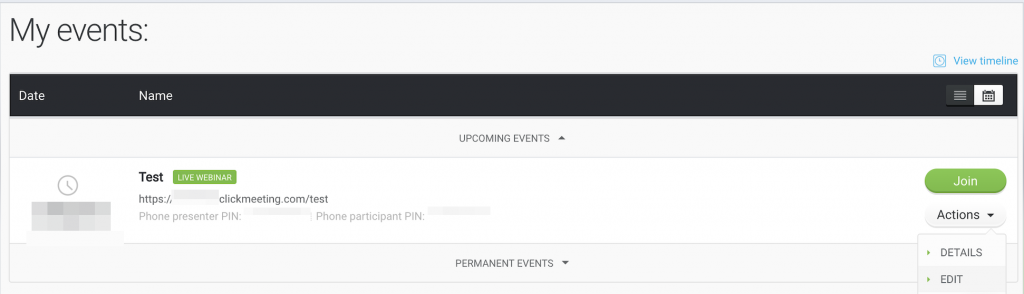
Go to Dashboard and click Actions → Edit next to a given room name. You can adjust the event time and other settings.
While editing an event, please keep in mind that you cannot change the room type from permanent to time-scheduled or vice versa. To have the event type changed, please contact us via chat. Use the chat icon in the bottom right corner.
Please note that once you have set a fee for a paid event, the fee cannot be changed. Feel free to change the event name, content and appearance if needed, though.
Don’t forget to save your changes!
How do I set up recurring events and event rooms I can use anytime?
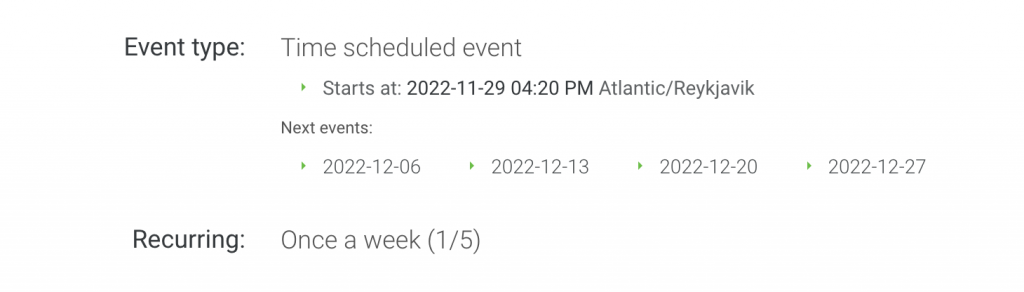
When planning a time-scheduled meeting or webinar, you can set it up as a recurring event. In your Dashboard click Create a webinar → Live webinar or Create a meeting → Planned meeting. Enter the room name, choose time-scheduled as the room type, then select the event’s time zone, date and time. Next, click on Repeat under the date. Do not repeat is enabled by default. You can schedule the event to occur daily, weekly or monthly or choose custom recurrence. Choose for how many days/weeks/months you want the event to occur.
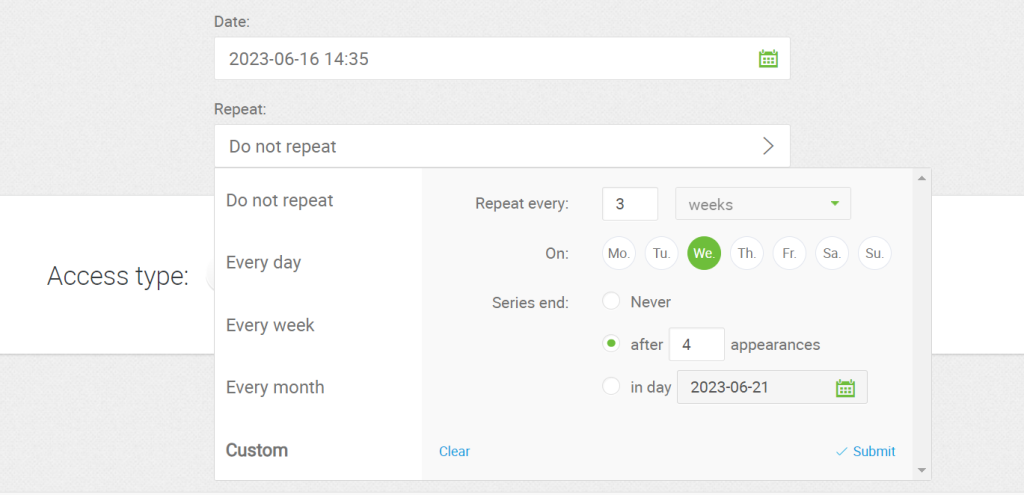
To see the dates of your recurring events, go to the Event details tab.
Keep in mind that:
- recurring events will have the same URL for participants for each repetition in the series
- recurring events will have a different URL for presenters for each repetition in the series
- the ID of a recurring event will always be different for participants and presenters
- if registration is enabled on a recurring event the participant should register for each repeating event separately
- the next recurring event will be created after the previous one has ended;
- invitations must be sent separately for each event. It is not possible to send invitations to several upcoming recurring events at the same time.
The recurring events feature is included in all ClickMeeting plans, paid and free.
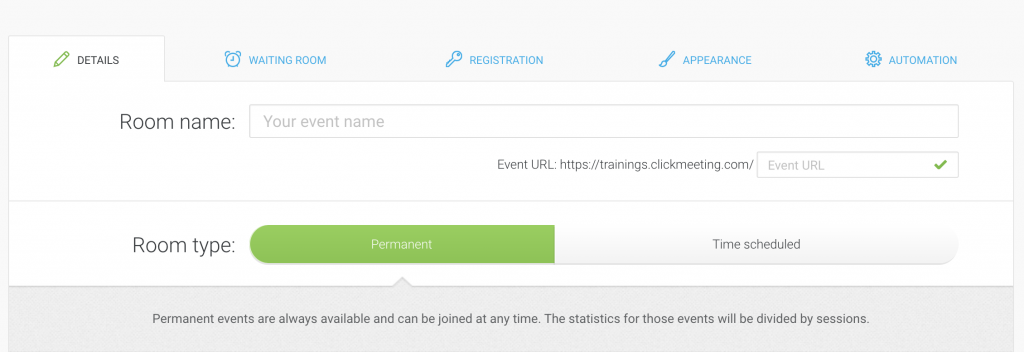
Permanent events can be accessed anytime you need. They are displayed on your Dashboard until you delete them. Attendees need to be invited only once and will join the sessions at the agreed time. Permanent event statistics are divided by sessions.
To schedule a permanent event, go to the Dashboard tab, click on Create a webinar → Live webinar or Create a meeting → Planned meeting. Enter the room name and select Permanent as the room type.
What phone numbers are available for ClickMeeting events?
Attendees who do not have the chance to join the event via laptop, computer, or smartphone can dial into the event. The dial-in numbers are included in the email invitation.
When setting up the event, you can choose the country your attendees will be mostly dialing from. If you choose nothing, we will send recommended phone numbers for each attendee based on their current location.
The phone gateway is turned off by default due to security measures. You can enable the phone gateway for particular events by editing them and changing the settings in the Automation tab and then the Basic settings section. Remember to save your changes.

Please note that the costs for such a call are borne by the attendee, which means that they will be charged depending on how long they have been listening to your webinar and what costs their phone providers offer. The costs for such a call may differ for each and every attendee who decides to use this option.
Can I send a certificate of attendance?
Yes, you can enable a certificate of attendance for registration-based events. Registration needs to be ON so you can collect attendee information that will be featured on certificates.
Please note that certificates are included in all Automated plans. If you are currently using a Live plan, upgrade to an Automated one or purchase the certificates add-on.
To enable certificates while scheduling an event, go to the Automation tab → Follow-up rules → Automatic thank-you email → Add a certificate for your attendees. Feel free to preview it if necessary.
If you have already scheduled an event, hover over Actions next to it in your Dashboard, click Edit to access the Automation tab and follow the same steps above.
After the event attendees will receive an automatic thank-you email where each can download their certificate.
You can send conditional certificates by setting how much time an attendee needs to spend at the event to receive such a certificate.
As a host, you can access each attendee’s certificate directly in your Account panel under Statistics. Once there, click Actions next to your event → View details, open the Attendee Summary tab, then click View details next to a given attendee to find their certificate.
Along with the information entered by each attendee during registration, each certificate includes the event name and date. The logo and color scheme featured in a certificate are both taken from the appearance settings of a given event. The signature is taken from your Account settings → Personal details.
Related materials