Registration
Landing pages (registration page)
Please note: The new version of the registration page is currently being tested and can be tried out using free ClickMeeting trial accounts.
The registration page (landing page) in ClickMeeting gives you greater freedom to organise your event and encourage participants to attend. You can customise its appearance to match your brand’s visual identity, include a description of the event, introduce the speakers and present the agenda.
As a result, the registration page can serve not only as a form but also as a showcase for your event. This is particularly useful when you’re promoting a webinar, conference, training session or paid event and want to provide potential participants with more information before they decide to register.
You can also add extra fields to the form to gather more information about your participants. What’s more, you can save the completed page as a template and reuse it for future events. This saves you time and ensures a consistent look and feel across your events.
Creating a registration page
You can configure the registration page when creating an event. In the Registration tab, toggle the switch to Registration page.
Then click Create new template. An editor will open, where you can customise the design of the page and the registration form yourself.
Adding elements to the page
In the ‘Elements’ section on the left-hand sidebar, you’ll find a ‘+’ icon which you can use to add individual elements to the page.
To showcase an event, you can use:
- Heading and text – introduce the event, describe its theme or programme.
- Separator – add spacing between individual sections to organise the content and improve readability.
- Image – include promotional graphics, a photo of the presenter or an illustration related to the event’s theme. Eye-catching visuals help to attract visitors’ attention.
- Video – add a video from files uploaded to your account, e.g. a short event trailer or a product presentation.
- YouTube video – embed a YouTube video, e.g. a recording featuring a speaker or a conference trailer.
- Link button – redirect visitors to another page, e.g. one containing additional information about the event, an offer or the terms and conditions.
- Columns – organise your content into several columns. This allows you, for example, to present several speakers side by side or highlight the key points of the agenda.
- Event name and date – highlight the most important organisational details.
- Organiser’s name – let visitors know who is responsible for organising the event.
- Countdown to the start of the event – show how much time is left until the webinar or conference begins. This may further encourage visitors to register early.
- Presenters’ profiles – introduce the speakers, their experience and areas of expertise. This is particularly useful during conferences, specialist training sessions and webinars featuring guest speakers.
- Downloads – provide visitors with additional materials, such as the event programme or a brochure.
- Logo – include your company or organisation’s logo to ensure brand recognition.
Customising the registration form
As well as the elements presenting the event, you can expand the form itself, which participants will complete during registration.
You can choose from the following fields:
- Free-text field and Text field – these allow you to collect additional information from participants, e.g. job title, company name or questions for the speaker.
- Lastname – enables you to collect the participant’s surname.
- Telephone number – allows you to obtain additional contact details if required for organising the event, e.g. to send SMS reminders about the event.
- Checkbox – allows participants to tick a selected option, e.g. to indicate an interest in a specific topic.
- Consents – allow you to add relevant declarations and consents, e.g. regarding the processing of personal data.
- Drop-down menu – allows participants to select one of the predefined answers.
- Radio buttons – allow you to select one answer from several available options.
Additional fields can be particularly useful if you want to gain a better understanding of participants’ needs before the event. For example, you can ask about their level of knowledge on a given topic, their expectations of the training, or issues they would like to discuss during the meeting.
Remember to ensure the form contains only the questions you actually need. A shorter and clearer form can make it easier for participants to register.
Editing and positioning elements
You can position all added elements anywhere on the page by dragging them to your chosen locations.
Click on the selected element to access its settings. The available options depend on the type of element.
For images, you can change:
- size and position;
- corner rounding;
- outline and its thickness;
- alternative text that describes the image’s content.
For text, you can customise:
- font type and size;
- font colour;
- formatting and alignment;
- text links;
- letter spacing;
- HTML tags.
With these settings, you can ensure the page is easy to read and match its appearance to your company’s other promotional materials.
Using pre-designed sections
You don’t need to design the entire page from scratch. In the ‘Sections’ tab on the left-hand sidebar, you’ll find suggested layouts for individual elements that we’ve prepared.
You can use these to create a clear and organised page more quickly, such as a section with an event description, an introduction to the speakers, or additional information.
Customising the appearance and branding
In the Style Settings tab, accessible via the left-hand sidebar, you can change the appearance of the entire registration page.
Customise the colours, style and other visual elements so that the page is consistent with your brand’s visual identity. This will enable participants to recognise the event organiser right from the registration stage.
How the page looks on mobile devices
You’ll find a mobile device icon in the top bar of the editor. Click it to switch to the smartphone view of the page.
You can customise the layout and appearance of elements on mobile devices separately. This ensures that the page remains clear and easy to use, even for people registering via their mobile phones.
Preview of the registration page
In the top right-hand corner of the editor, you’ll find the Preview button. Click it to see what the page will look like from a participant’s perspective.
Before saving the template, make sure that all elements are positioned correctly and that the form contains the necessary fields.
Configuring the registration thank-you page
You can also customise the page that participants will see once they have completed their registration.
In the top-left corner of the editor, switch the view from ‘Registration form’ to ‘Thank-you page’.
As with the registration page, you can add your own elements or use the ready-made options available in the Sections tab.
It’s worth using this space to:
- thank participants for registering;
- provide additional organisational information;
- remind them of the date and time of the event;
- explain how to join the meeting;
- share additional materials or links.
You can also customise the look of the thank-you page to ensure visual consistency with the landing page.
In the top right-hand corner, you’ll find a Preview button, which allows you to check how the thank-you page will look to participants.
Saving a template
Are you happy with all your changes? Click the green ‘Save’ button in the top right-hand corner of the editor and give your template a name.
This will allow you to use the layout you’ve created when setting up future events. It’s a handy solution if you organise regular webinars, training sessions or conferences and want to maintain a consistent look for your registration pages.
Additional registration page settings
Once you have selected a saved template, you can proceed to the additional registration page settings.
Creating templates without planning an event
You don’t need to create an event to set up a registration page. You can design a landing page in advance and save it as a template, then use it when setting up a future event.
To do this, go to the account menu, expand the sidebar on the left and select Landing pages > Templates.
This is particularly useful if you organise recurring events and want to prepare several page variants in advance, e.g. for different series of webinars, training courses or conferences.
Registration page analytics
Would you like to check how effective your registration page is? Go to the account menu, expand the sidebar on the left and select Landing pages > Reports.
Find the event in the list for which you wish to view the statistics.
In the report, you’ll see:
- Number of views – how many times the registration page has been visited.
- Number of registered participants – how many people have registered via the page.
- Conversion rate – what percentage of page views resulted in a registration.
With this data, you can assess how effectively your page encourages visitors to sign up for the event and compare the results of different landing pages.
To view more information, click ‘View details’. There you will also find a list of people who have registered for the event.
Can attendees register for my events?
Registration is available and should be enabled for the selected event. Go to the Registration tab and turn the registration button to the On position. First name and email address are required by default. If you want to add a new element from the list on the right-hand side, click it and drag and drop onto the registration page layout.

In order to obtain the room URL, your invitees need to find the invitation to registration in their mailbox and follow the link to the registration form. Once they have registered, they will receive the confirmation message with the room URL.
If you enable Registration, you’ll know in advance how many people want to participate, so you can capture any additional information you need.
You can limit the number of people who can register for your upcoming event. Another feature you may find useful is choosing the date when registration is to be closed. These two features can be used at the same time, if required, and are enabled upon request. To have them enabled, please contact us via email or live chat.

If you want participants to provide a business email address when registering for your events, or you want to exclude the email address of a specific domain, you can enable the appropriate settings for each registration form you create.

What are the benefits of registration?
1. Collecting contact participants’ details
With the registration form you can collect relevant information such as name, lastname, email address or other information relevant to your event, its purpose or theme.
The information collected will allow you to:
– conduct more effective pre- and post-event communication,
– building an email database for future campaigns promoting future events,
– comply with RODO and data protection requirements.
2. Better control over event attendance
The registration form allows you to monitor the number of people signed up for an event. With this you can:
– better prepare to handle the event and your speech,
– estimate interest in your event in advance and, if necessary, increase your package to let all participants in;
– plan reminder emails and promotional activities.
3. Sending automatic messages and reminders
You can set up the automatic sending of:
– registration confirmations (default option),
– e-mail reminders the day or an hour or other selected date before the event,
– a thank-you email after the webinar with the materials or recording,
– messages to those registered but not attending.
All of this significantly increases the chances of high attendance and participant engagement.
4. Collecting marketing consents and GDPR
The registration form can include checkboxes for marketing consents, which is particularly important for GDPR-compliant activities. This facilitates subsequent communication with participants and registrants.
5. Reporting and analysis
During the registration process or after the event, you have access to the following information:
– number of people registered – the list ready to download;
– number of participants – the list ready to download;
– attendee activity during the event;
– registration sources (e.g. campaigns, landing pages).
The above data will allow you to optimise your follow-up webinar activities. Full details of the statistics can be found here.
What does the process of registration look like?
Once registration is ON, your potential attendees are presented with a registration form that they need to complete to be able to join the event. The Name and Email address fields are required by default. You can add extra fields if you like.
Once registration is completed, each registered user receives a confirmation email with a personal link to join the event. A list of steps to follow after registration is displayed to each registered user to further facilitate the registration process.

What can the host do once registration is enabled?
- Access the list of registered users
To access a list of users registered for your upcoming event, click Actions next to a given event in your Account panel, then go to Details → Registration. The list is being constantly updated with each new registration. Click Export to CSV or Export to XLS to download the list. To download the list after the event, go to Statistics.
- Deny event access to a given registered user
To delete an individual registration, click Actions next to the person’s email in the registration list → Delete.
Once you delete someone’s registration, their event link will become inactive and they will no longer have access to the event.
- Import contact list (CSV)
Keep this feature in mind if you are using an external registration form and need attendees to receive a confirmation email with the event link from ClickMeeting. To use this feature, open the Registration tab of a given event and click Import contact list (CSV).

A confirmation of registration with the event access link will be emailed to each person from your contact list.
- Manually confirm registered users
If you want to have full control over who receives access to your event after registration, you can manually confirm each registered user. To enable the Manual confirmation feature, click Actions next to a given event in your Dashboard → Edit → go the the Registration tab. Scroll down until you see Require my manual confirmation and toggle it on.

Note that the users who are pending approval will not be able to join the event before you accept their registration.
How can I customize my registration form?
You can edit the form and tailor it to your needs by adding
- extra fields – each can be made required
- hyperlinks to link a newsletter/privacy policy, among other things
- additional information such as presenter profiles, an event agenda, text fields, a YouTube video
Note that registration confirmation emails cannot be edited.
Can I redirect my attendees to a website after the registration?
Yes, you can automatically redirect your participants to your thank-you page or any landing page by entering a URL in the Registration tab. Your attendees will be taken to that address as soon as they finish registering.

How do I embed a registration form on my website?
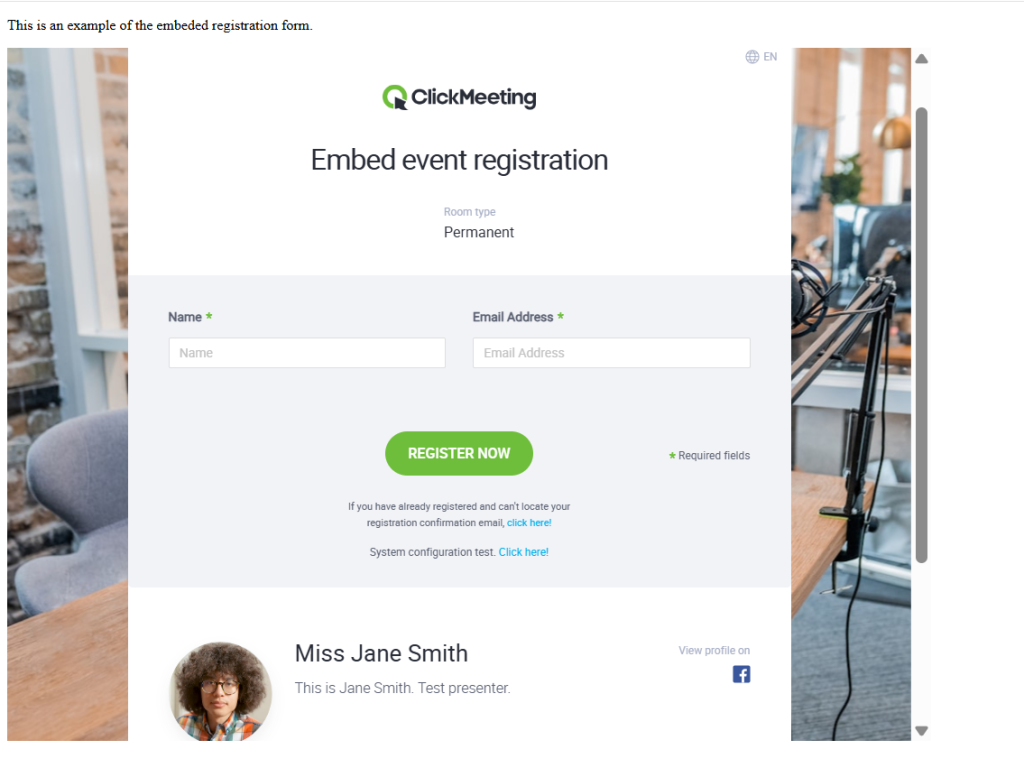
By embedding a webinar that has registration on, you are basically embedding the registration form in the first place. Potential visitors will access it on your site, then receive a registration confirmation email with a link to join the event.
Related materials