Integrations
What services does ClickMeeting integrate with?
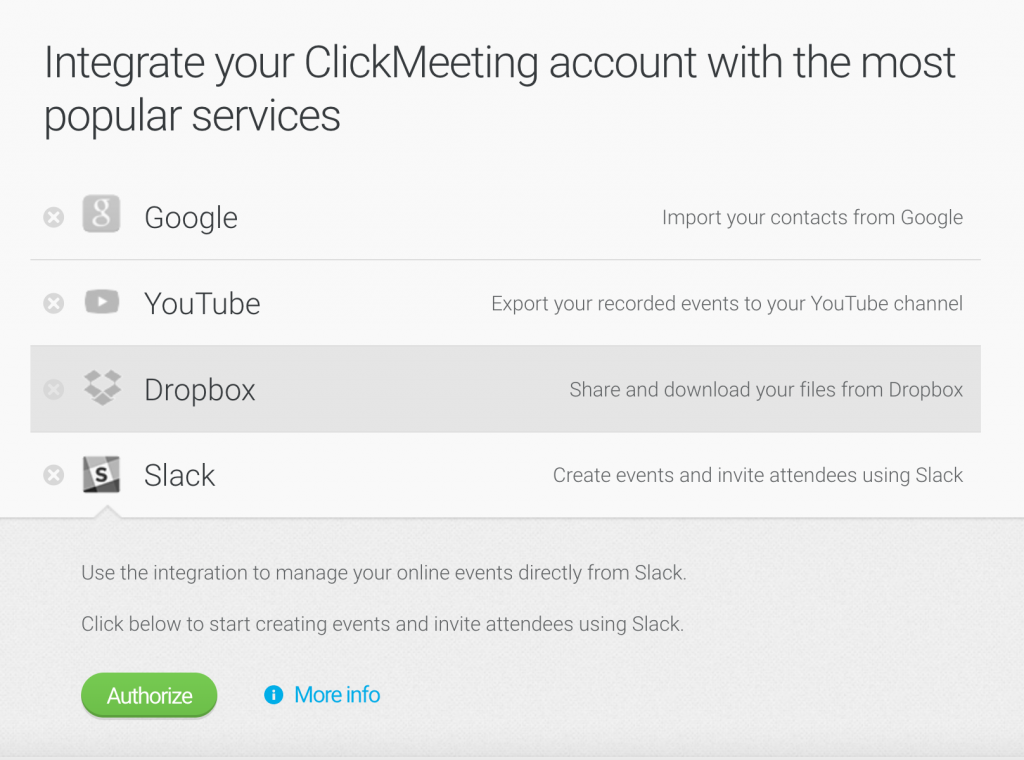
To integrate your ClickMeeting account with popular external platforms, log in to your ClickMeeting account panel, hover over your profile picture in the top right corner and go to Account settings → Integrations.

Click on the service you would like to integrate with and follow the on-screen instructions.
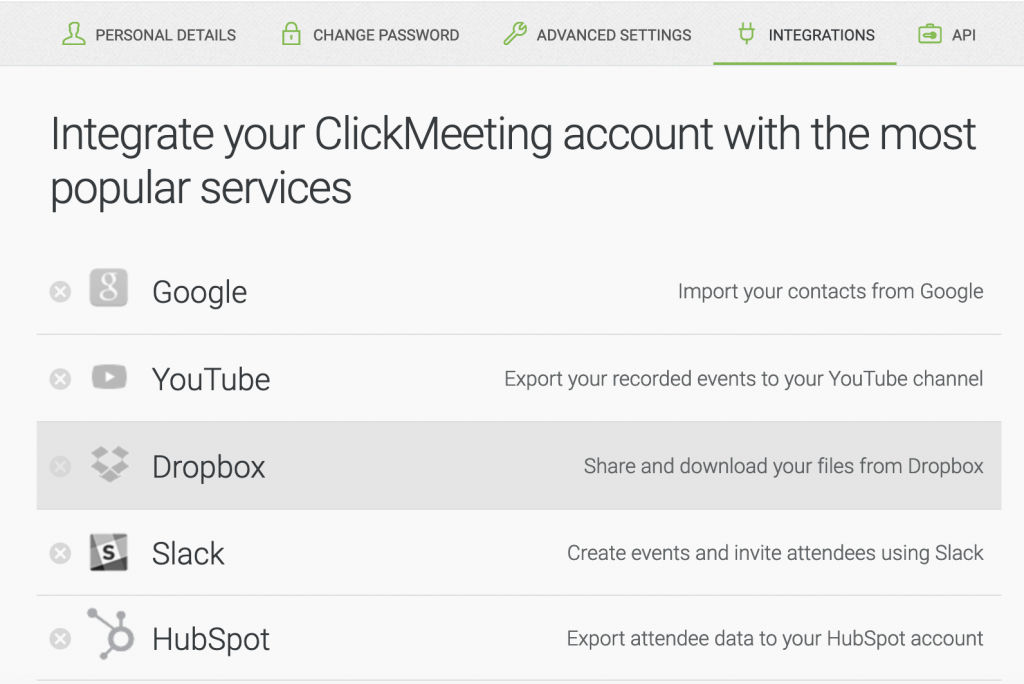
Feel free to integrate your ClickMeeting account with the following services:
MailerLite
Send email campaigns effortlessly. MailerLite helps you design, automate, and deliver messages without any extra work.
The MailerLite integration will allow you to export contacts of registered users and event attendees from ClickMeeting to MailerLite, as well as import contacts from a selected MailerLite group into ClickMeeting.
How does it work?
First, log in to your MailerLite account and select Integrations from the menu on the left.
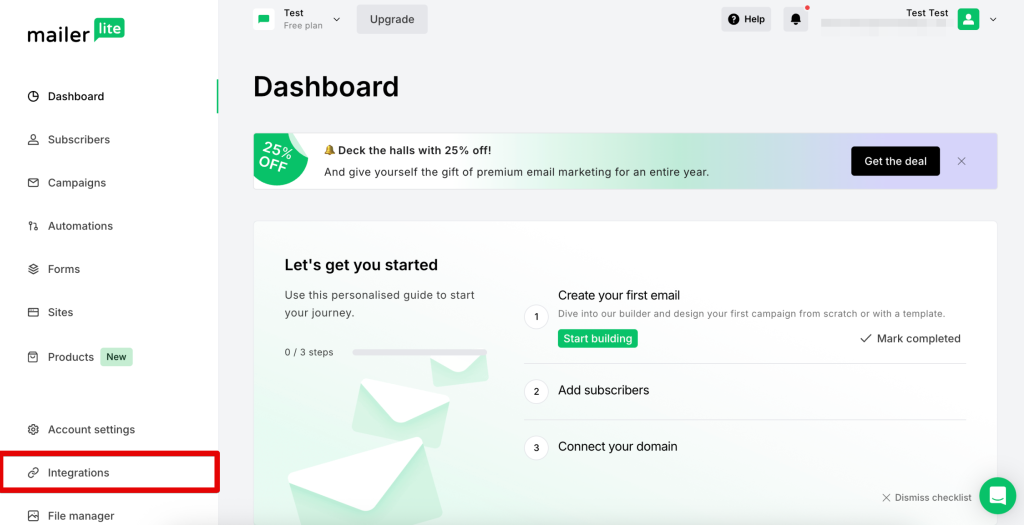
Click Use next to the API.
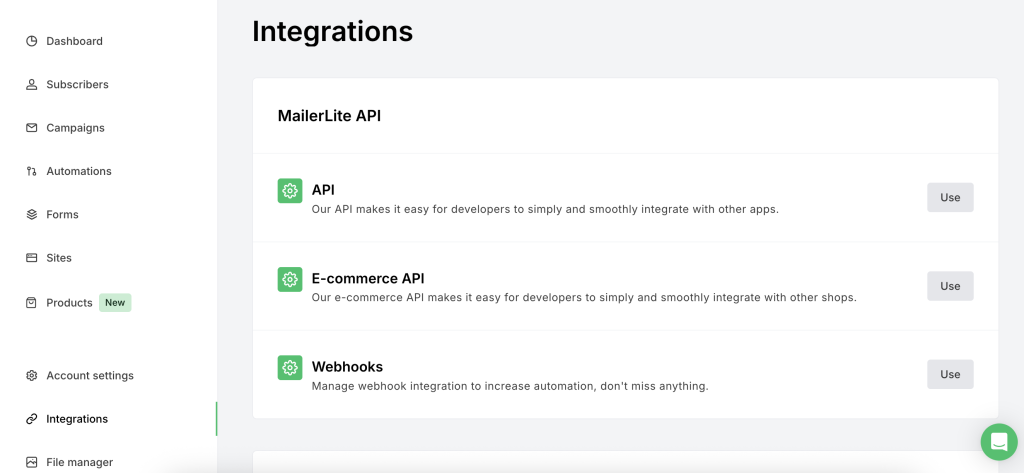
Then click Generate new token.
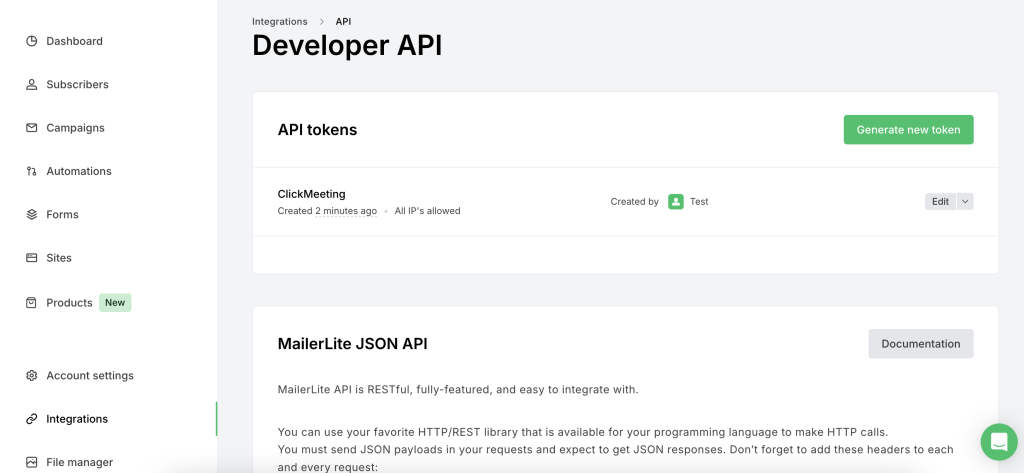
In this step, provide a token name (e.g., ClickMeeting), allow all IPs, and check the agreement box.
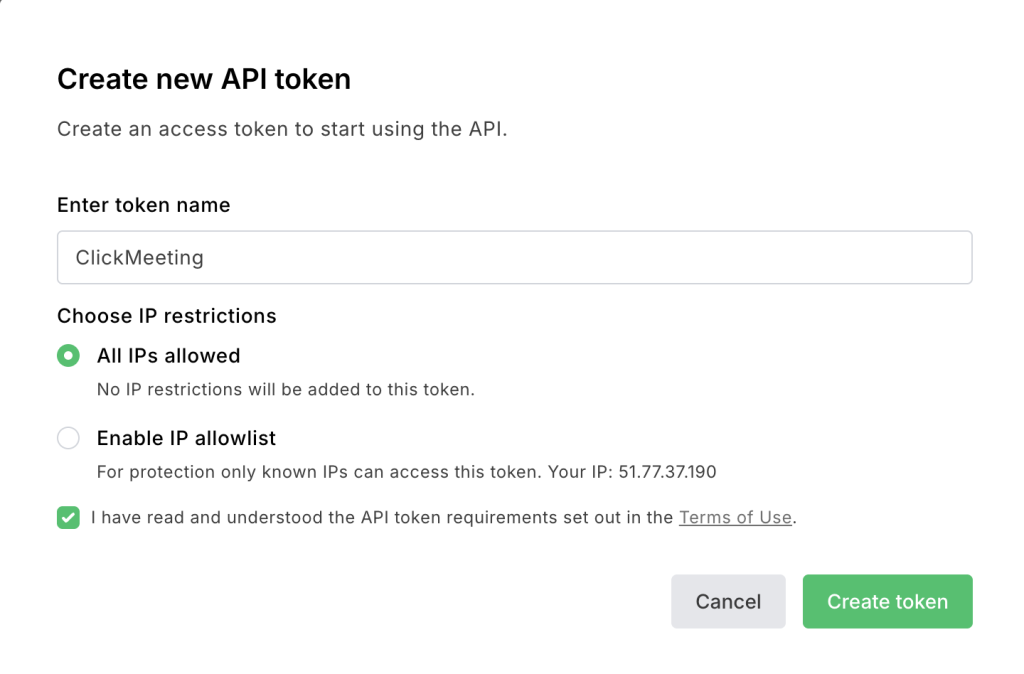
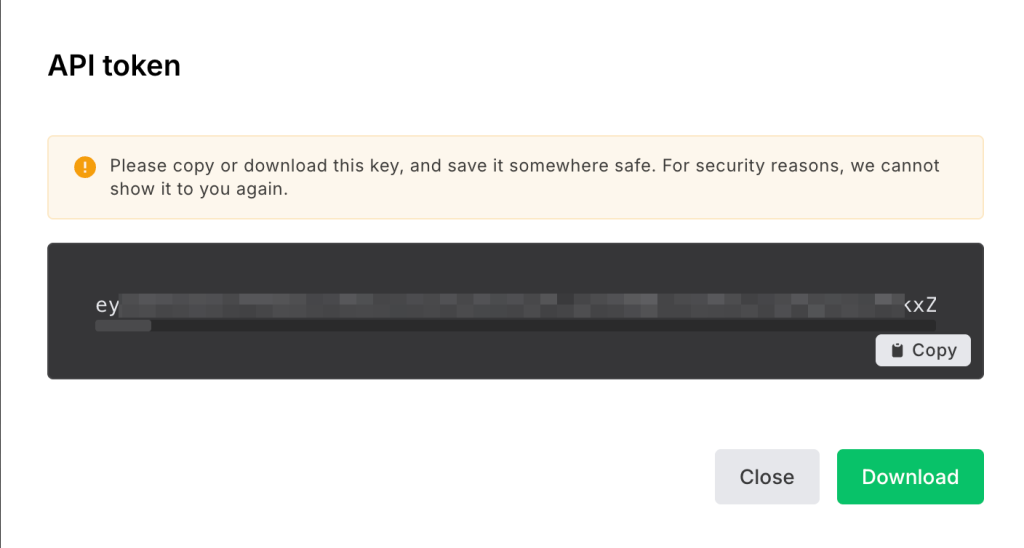
Copy the API key, then return to your ClickMeeting account.
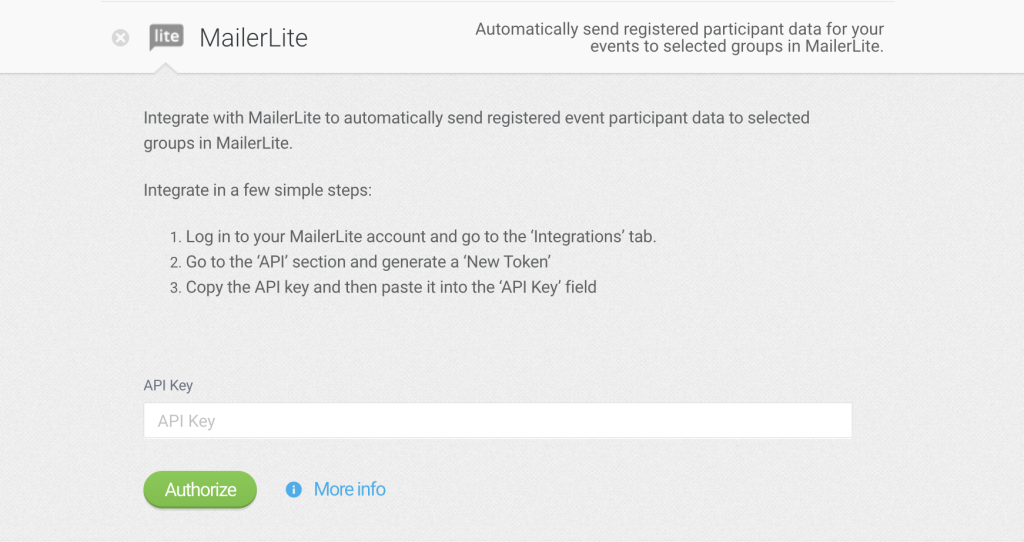
Select the Integrations tab. Choose MailerLite from the list of available integrations, paste the copied API key, and click Authorize.
Done! You’re ready to go!
When planning an event, you can set the following data export actions from ClickMeeting to MailerLite:
- After a participant registers for the event, send their data to group X – selected from MailerLite.
- Send the data of participants who attended the entire event to group X – selected from MailerLite.
- Send the data of participants who joined the event to group X – selected from MailerLite.
Note: Groups can be created and managed directly in MailerLite.

Importing contacts from MailerLite to ClickMeeting is possible after creating an event with registration enabled:
- Go to the event details and navigate to the Registration tab, in the Import Contacts section.
- Select the MailerLite group from which the contacts will be transferred.
- Additionally, you can choose whether the imported contacts should receive a registration confirmation with an individual ClickMeeting link.
Note: Groups can be created and managed directly in MailerLite.

Keap
Create contact lists automatically. Keap will build and develop them with no effort on your side.
Keap will let you organize all the contacts and build them into well-segregated lists. Contact list building has never been easier! Integration collects valuable and easy-to-use data that will help you grow your business.
Automatically export attendee and webinar data into your Keap account. Your exported data will include the following information:
- Who attended your webinar
- The webinar they attended
- The date of the webinar
- Registered users – users who registered for your webinar but never attended.
Bear in mind that Keap integration is only available for Keap paid account holders.
How does it work?
Select Account Settings in the upper-right corner of the screen.
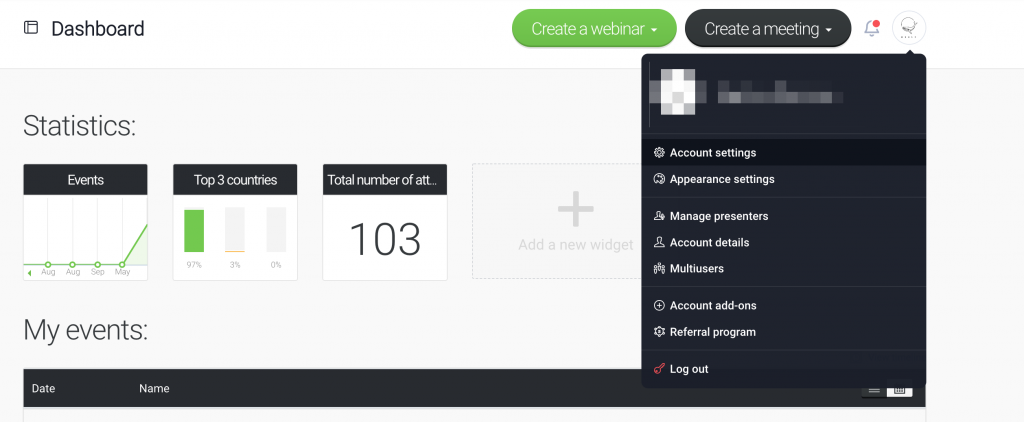
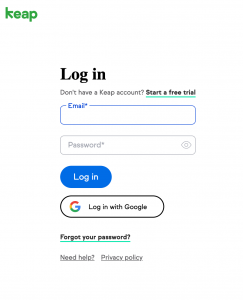
Select the Integrations tab. Choose Keap from the list of available integrations and click Authorize.
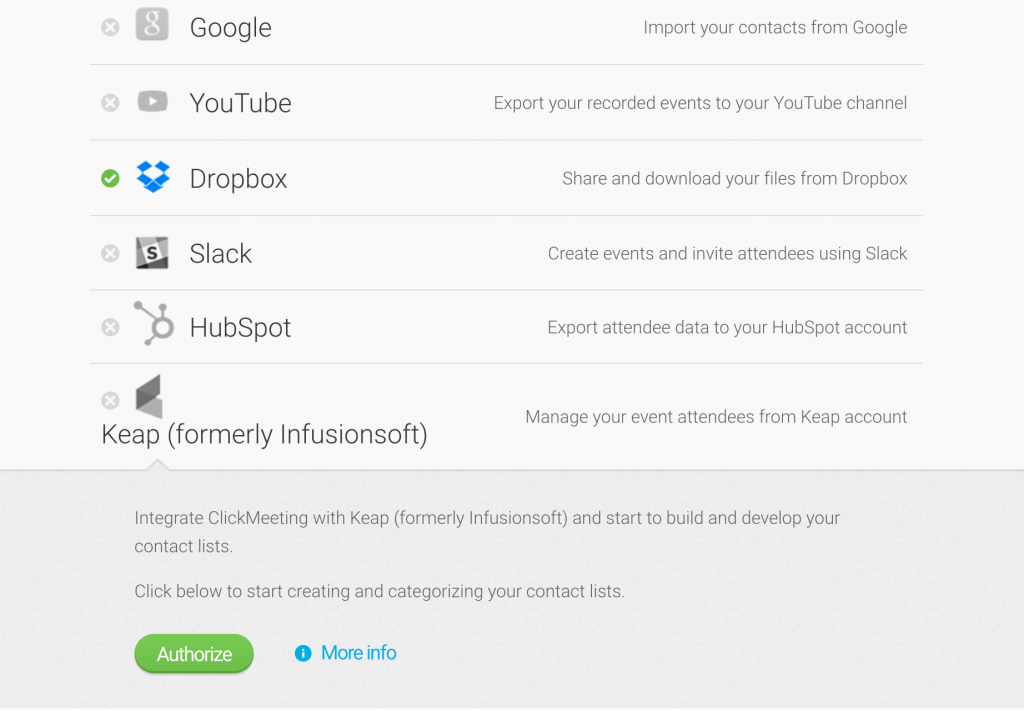
The authorization screen will pop up. You’ll be asked to provide your Keap login and password. Once you submit them, your account will be fully integrated with Keap.
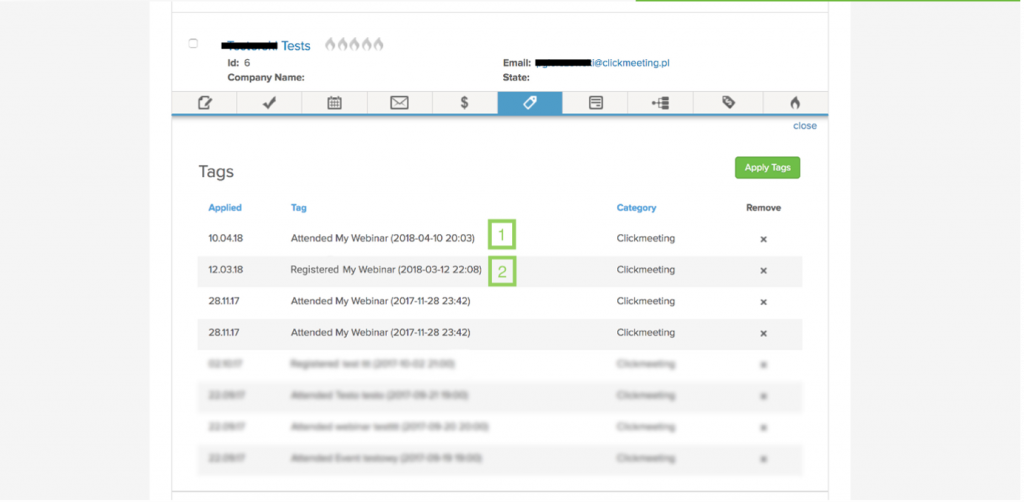
When your event finishes, go to your Keap account. Your event and attendee data has been automatically exported and sorted by the specific field.
Tag 1* (Registered) describes those who have registered for your event, but haven’t attended it.
Tag 2* (Attended) describes those who have registered and actually attended your event.
Pipedrive
Improve your sales results by integrating ClickMeeting with Pipedrive. Collect and analyze data on your webinar attendees and manage your sales funnel effectively.
This integration enables you to export attendee and webinar data into your Pipedrive account automatically. The integration works in two ways.
1. Webinar with enabled registration
After the registration, your attendee data is exported to your Pipedrive account, and a new record (Deal) is created. Each Deal has assigned:
- webinar room ID for the event they’ve attended
- attendee’s name, last name and email address. A note will also appear: registered for the event (date). The data of registrant who also joined the event will be added as a separate Deal with a note containing the event login time.
2. Webinar without registration
After the webinar, your attendee data is exported to your Pipedrive account, and a new record (Deal) is created. Each Deal has assigned:
- webinar room ID for the event they’ve attended
- attendee’s name, last name and email address of the attendee with a note containing the event login time.
If you organized a poll or survey during your webinar, its results will be exported to your Pipedrive account as well, and those results will be assigned accordingly to each Deal.
How does it work?
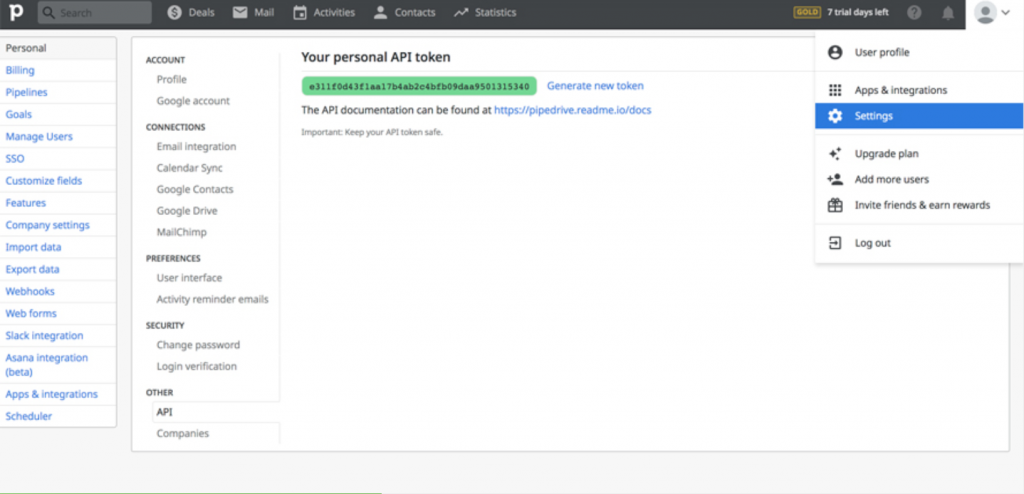
First, go to the Account Settings in the upper right corner of your Pipedrive account panel. Select API from the left-hand menu and copy your personal API token.
Now, go to your ClickMeeting account and select Account Settings in the upper-right corner of the screen.

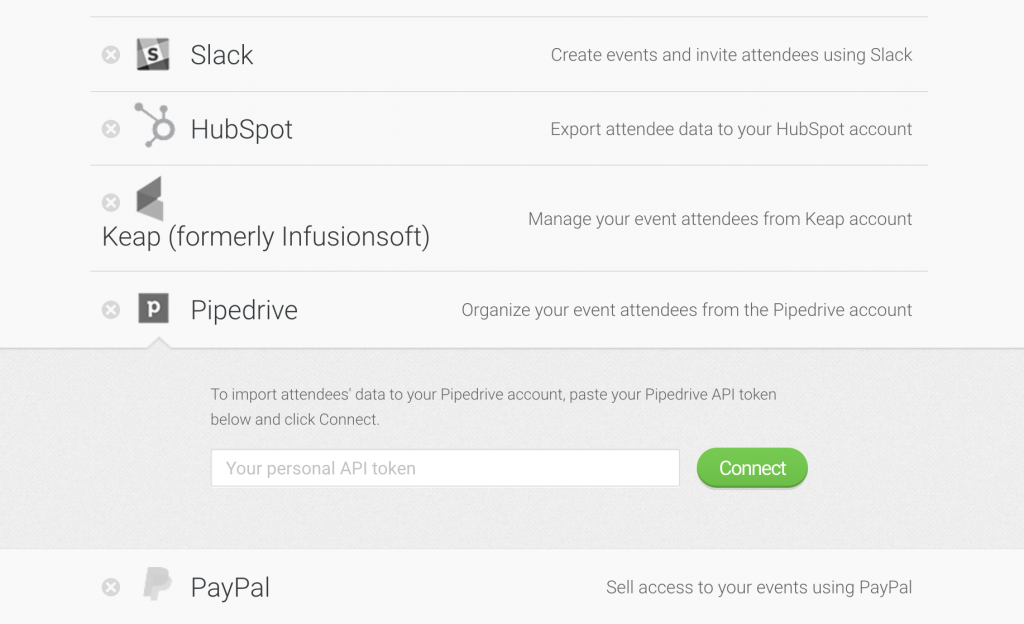
Select the Integrations tab. Choose Pipedrive from the list of available integrations, paste your personal API token from Pipedrive and click Connect.
Stripe Connect
With Stripe Connect, you can create and configure your Stripe account without leaving ClickMeeting. The entire process is based on filling out information in an intuitive setup wizard.
Learn more about paid webinars on ClickMeeting.
I Don’t Have a Stripe Account Yet
Click the Integrate button next to the Stripe icon.
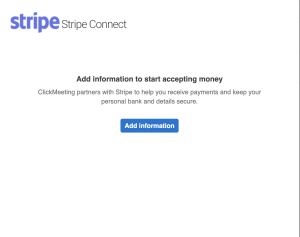
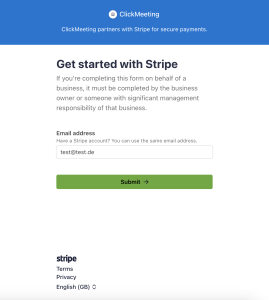
Click Add information to start the account creation and integration process.
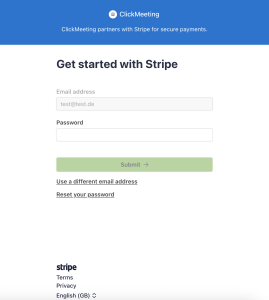
Enter the email address you want to use for your Stripe account. By default, the email associated with your ClickMeeting account will appear, but you can change it. Set a password that you’ll use to log in to Stripe.
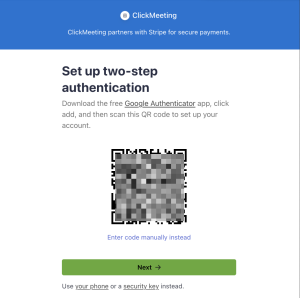
The next step is two-factor authentication (2FA). Download the Google Authenticator app from Google Play or the App Store. Open the app and scan the QR code displayed on the screen.
Download and save the backup access code – it will be useful if you lose access to the Google Authenticator app.
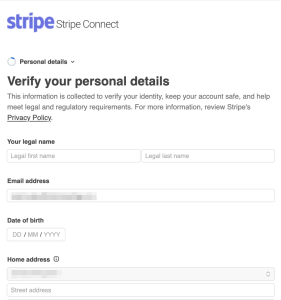
Next, complete all required personal and business information according to the Stripe form.
STEP 1.
In the first window, specify your location and the type of your business. Importantly: both legal entities and individuals can register with Stripe, including those not running a business.
STEP 2.
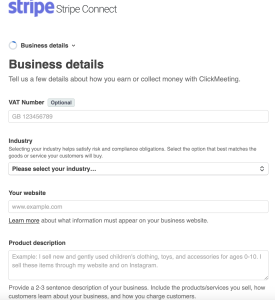
Next, provide detailed information including your tax ID number (NIP), the industry you operate in, and your website address. Also, include a short description of what you do (e.g., “I sell paid webinars”).
STEP 3.
The next window concerns your bank account. Set your currency and enter your account number along with the IBAN code.
STEP 4.
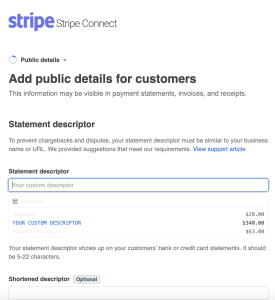
Now you can configure the data visible to customers who purchase access to your webinars:
- Statement descriptor is the name that participants will see after paying for their ticket. You can enter your company name or, for example, your name and company name.
- Shortened descriptor – abbreviated company name or full name that may appear in charge details.
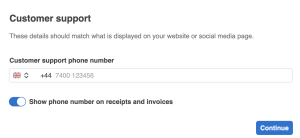
- Customer support phone number is the number where recipients can obtain necessary information.
STEP 5 (optional).
This next window is optional. Here, you can indicate whether you want to allocate a certain percentage of your revenue to climate protection efforts. You can treat this commitment as an added incentive for people to join your webinars. But you don’t have to – simply click “No, thanks” if you prefer not to.
STEP 6 (optional).
Stripe can also help you correctly handle VAT. If you agree to use Stripe Tax, the service will inform you, for example, when you exceed the threshold requiring you to settle this tax, or about deadlines. If you want to use it, select the type of goods you sell and click “Agree to Stripe Tax.” You can also choose the “Not now” option.
STEP 7.
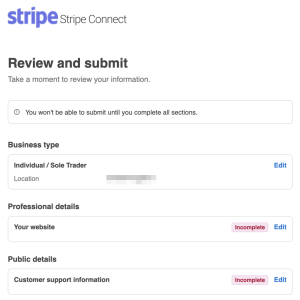
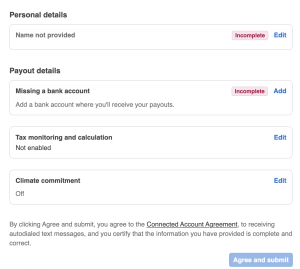
This is the final step. Check that all the information you’ve entered is correct. If everything is accurate, click “Agree and submit.” Done! Now all you have to do is wait for Stripe to verify your data.
Please note that the activation of your account may take some time (usually up to 24 hours).
You will be informed of the verification progress via a banner at the top of the page.
You will also receive an email confirmation.
We will notify you in the same way if the verification fails.
As soon as you receive confirmation that verification was successful, you can start accepting payments for event access. You can configure available payment methods in your Stripe account here.
NOTE: Stripe, which handles payments, in most cases randomly verifies accounts after some time and may ask for an identity document.
In such a situation, Stripe sends an email with a link leading to the Stripe panel where you need to upload the document.
We recommend adding your ID immediately after creating your Stripe account.
1.Log in to your Stripe account.
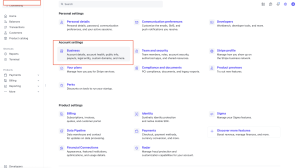
2.Go to Settings > Account settings.
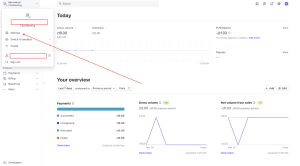
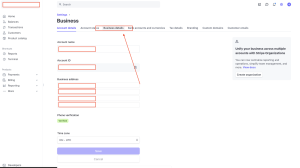
3.In the Business section, click Business details.
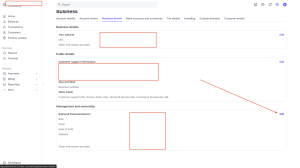
4.In the Management and ownership section, click the Edit button.
5.Scroll down the displayed window and in the ID verification section, add your identity document.
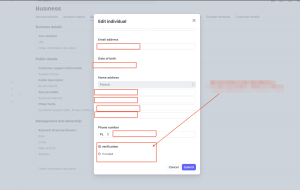
Stripe most often accepts documents such as: identity card, passport, or driver’s license (depending on the country and type of account).
I already have a Stripe account
Thanks to Stripe Connect, you can connect your Stripe account with ClickMeeting. The entire process is based on completing data in an intuitive wizard.
Click the Integrate button next to the Stripe icon.
Click Add information to start the integration process.
Enter the email address associated with your Stripe account. By default, the email associated with your ClickMeeting account will appear, but you can change it. Enter the password you use to log in to Stripe.
The next step is two-factor authentication (2FA). Download the Google Authenticator app from Google Play or the App Store. Open the app and scan the QR code displayed on the screen.
Download and save the backup access code – it will be useful if you lose access to the Google Authenticator app.
Next, complete all required personal and business information according to the Stripe form. You can repeat the same data you already have in Stripe or change them to new ones.
STEP 1: In the first window, specify your location and type of business.
STEP 2: In the next window, provide detailed information, including your VAT number, industry, and website address. Also, include a brief description of what you do (e.g., “I sell paid webinars”).
STEP 3: The next window concerns your bank account. Set the currency and enter your account number along with the IBAN code.
STEP 4: Now you can set up information visible to customers who purchase access to your webinars:
- Statement descriptor – this is the name participants will see after paying for a ticket. You can enter your company name or, for example, your name and company name.
- Shortened description – abbreviated company name or full name that may appear in charge details.
- Customer support phone number – this is the number where recipients can obtain necessary information.
STEP 5 (optional): The next window is optional. Indicate whether you want to donate a certain percentage of revenue to climate protection causes. You can treat this commitment as an additional incentive for participants to join your webinars. However, you don’t have to do this – simply click the “No, thanks” button.
STEP 6 (optional): Stripe can also help you correctly handle VAT settlements. If you agree to use Stripe Tax, the service will notify you, among other things, when you exceed the threshold that requires you to account for VAT, as well as important deadlines. If you’d like to enable it, select the type of products you sell and click the “Agree to Stripe Tax” button. You can also choose “Not now”.
STEP 7: This is the final step. Review all the information you’ve entered. If everything is correct, click “Agree and submit.” Done!
You can configure the available payment methods directly in your Stripe account here.
PayPal REST
With PayPal integration, you can sell event tickets and make money on donations from attendees.
Please note that it is necessary to have a PayPal business account.
Connect ClickMeeting and PayPal in four simple steps:
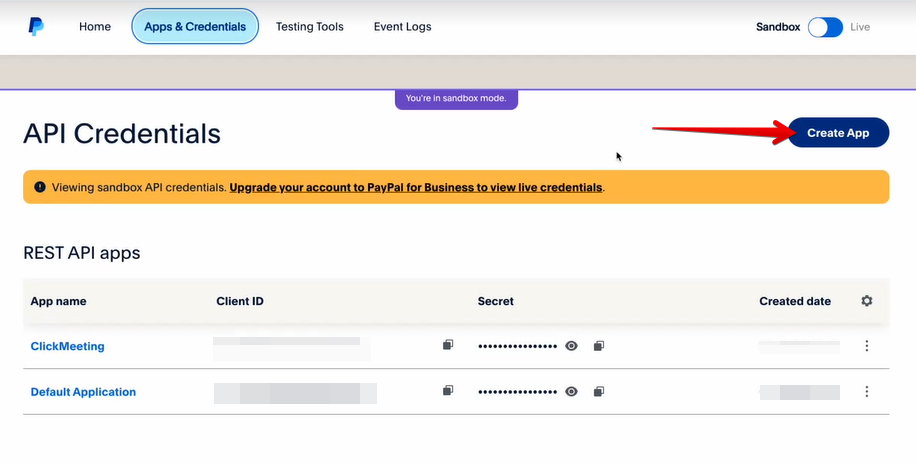
1. Log in to your PayPal account via https://developer.paypal.com/dashboard/applications
2. Go to the Developers tab >> Apps & Credentials and select the Api Credentials section from the list. Click the switch in the upper right corner to change from Sandbox mode to Live.
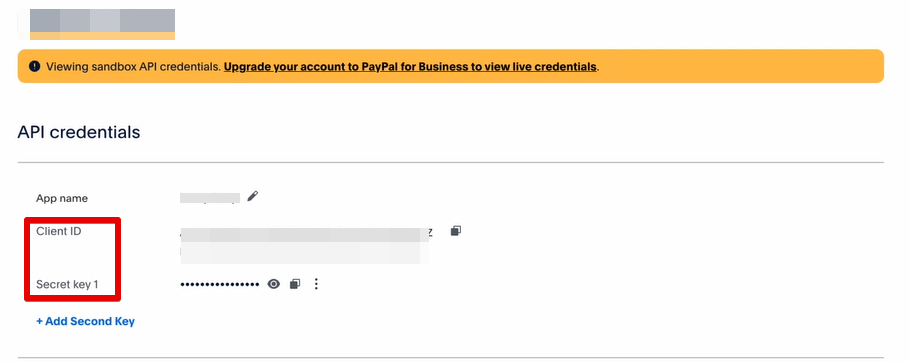
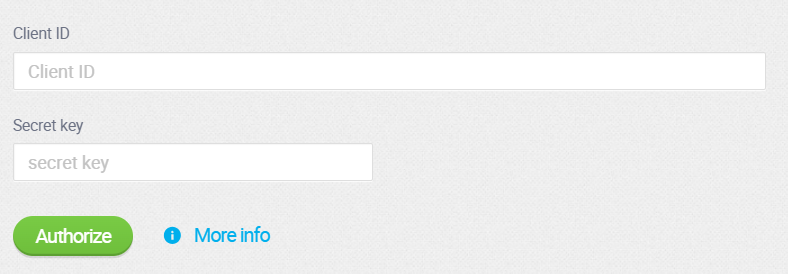
3. Create a new app, name it and copy the Client ID and Secret key data.
4. Paste the ID and key into the fields in the ClickMeeting account panel and click Authorize.
Moodle
Engage with your students even more effectively. Connect online classes with webinars and run them directly from Moodle platform.
With Moodle schedule and conduct your online classes. Get the access to all the necessary tools from your LMS and combine it with webinars — everything in one place.
How does it work:
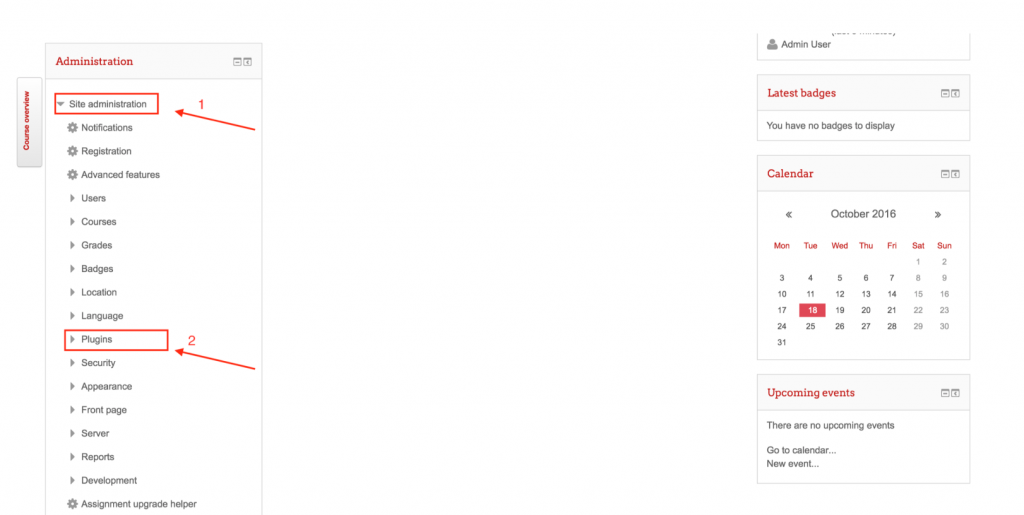
Log into your Moodle Account. Click Site Administration on the left-hand side panel, choose Plug-ins from the drop-down menu and click Install Plug-ins.
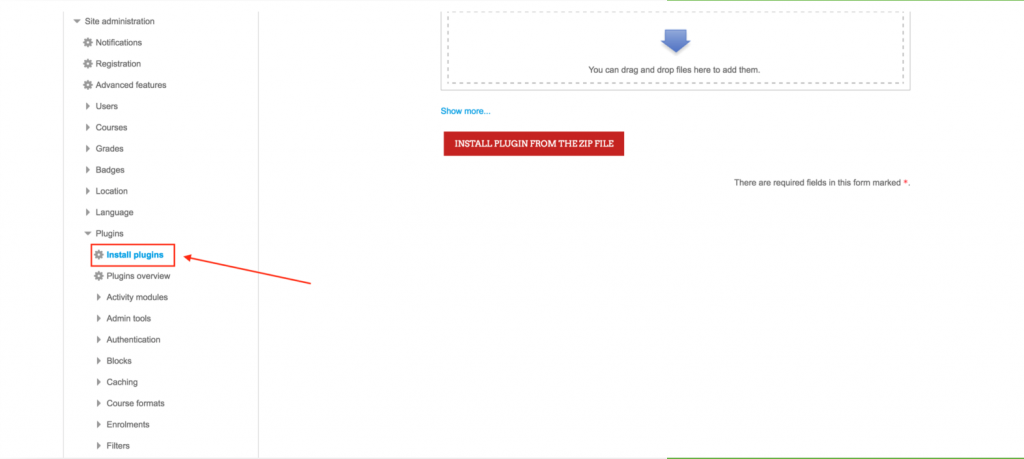
Go back to Moodle and add the downloaded plug-in on Install Plug-in site then click INSTALL PLUG-IN FROM THE ZIP FILE button.
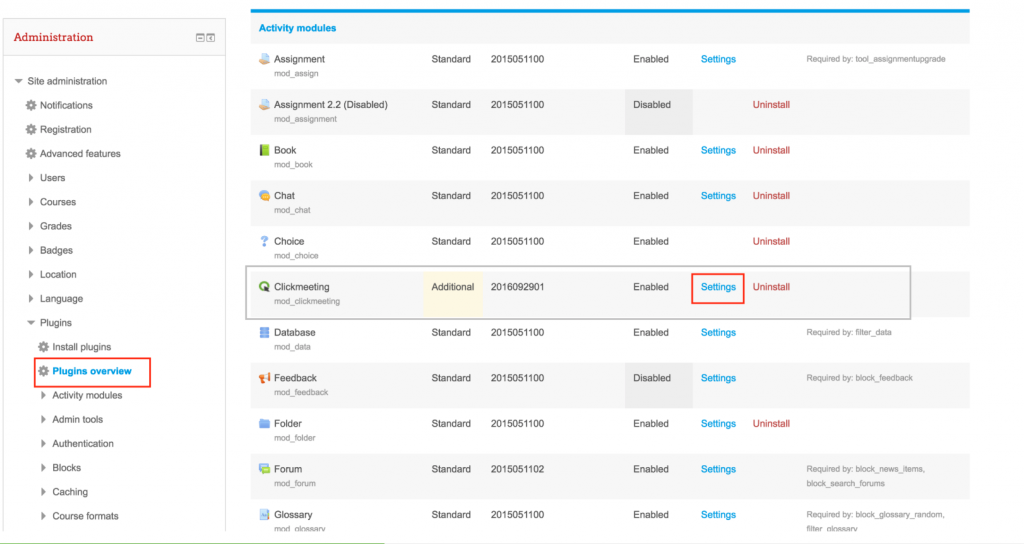
From the drop-down menu on the panel to your left, choose the Plug-ins overview tab. Click Account Settings next to the ClickMeeting plug-in.
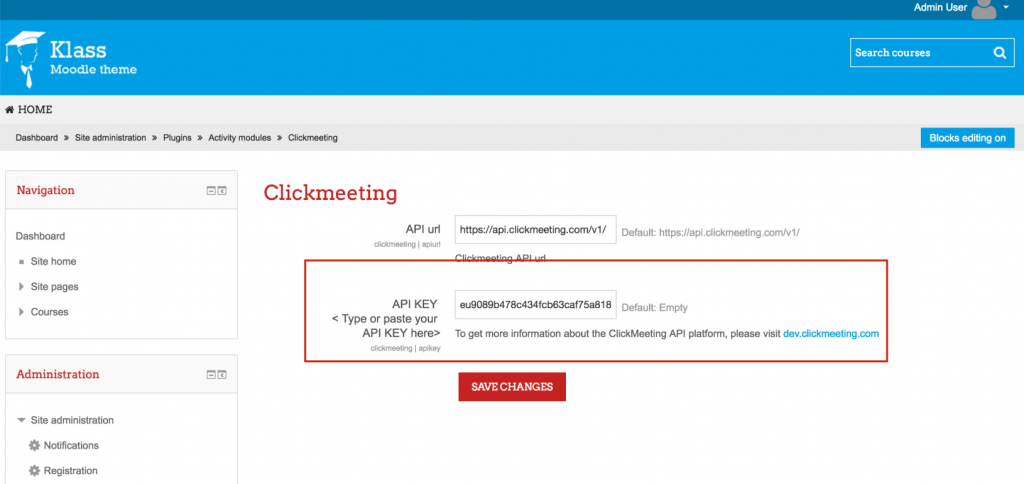
Now you need your ClickMeeting API Key. To get it, go to your ClickMeeting Account Settings in the upper right corner of the screen and open the API tab. Next, click the Add new button, enter API key name and click Save. You can now copy your API key. Be sure to copy it as soon as you generate it, as you would not be able to once you leave/refresh the page.
Go back to Moodle and paste your API into the API KEY field.
How to create a ClickMeeting event from Moodle?
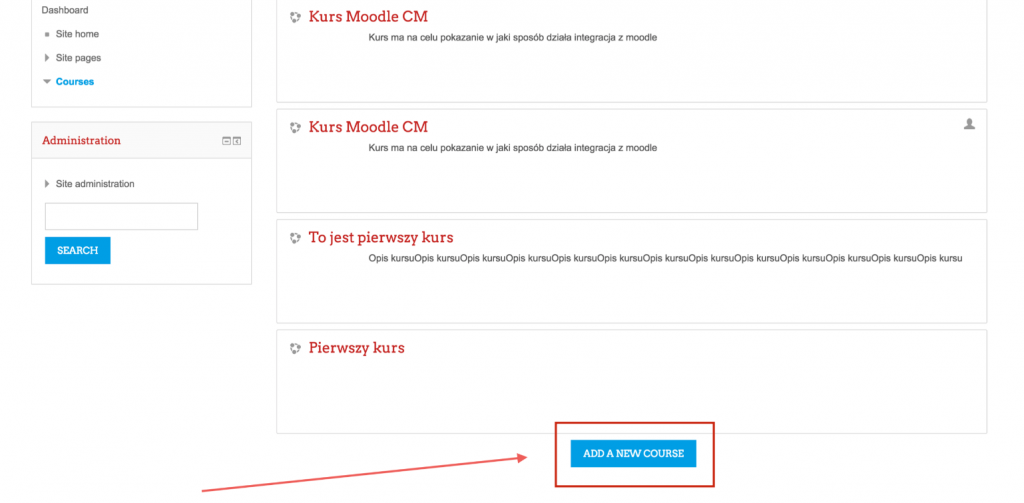
Go to the Dashboard and click ADD A NEW COURSE button.
You’ll be directed to the creator where you can prepare your course: add a title and description, upload files. In the Course format section you’ll see two drop-down menus. Choose single format activity from the first menu and Virtual Class from the second.
Click SAVE and DISPLAY.
In the panel on your left, click the name of the course you’ve created. You’ll see the window where you can create your ClickMeeting event. Fill in all the fields to provide your students with clear information and click SAVE and DISPLAY.
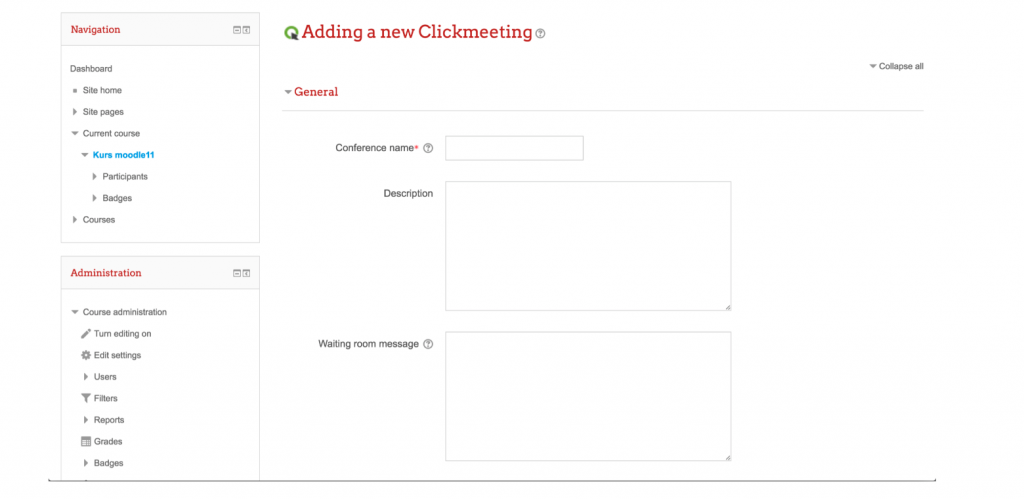
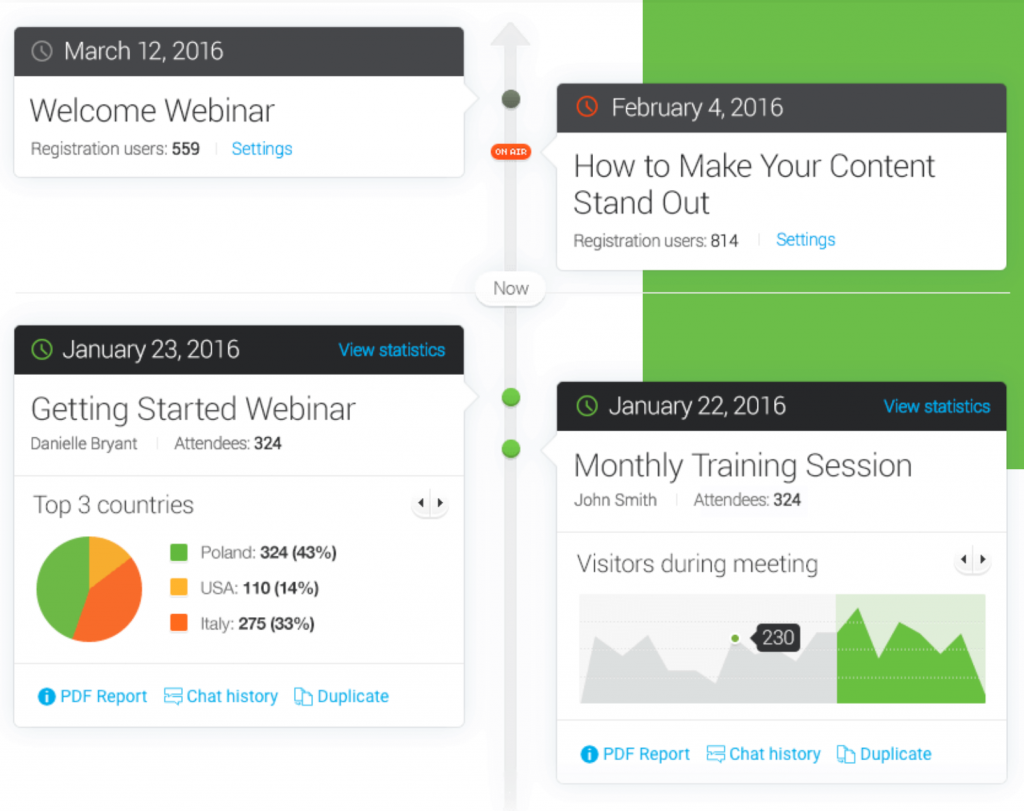
Your event has now been created and exported into your ClickMeeting timeline. Click the Join event button, and you’ll be taken to your webinar room.
You can embed your ClickMeeting webinar room on your website. Use the code displayed under the Join event button.

GetResponse
Build and develop your contact list and boost your lead generation.
With the ClickMeeting GetResponse integration, you can automatically export your webinar attendee data directly into your GetResponse account for use in email marketing campaigns.
How to integrate ClickMeeting with GetResponse?
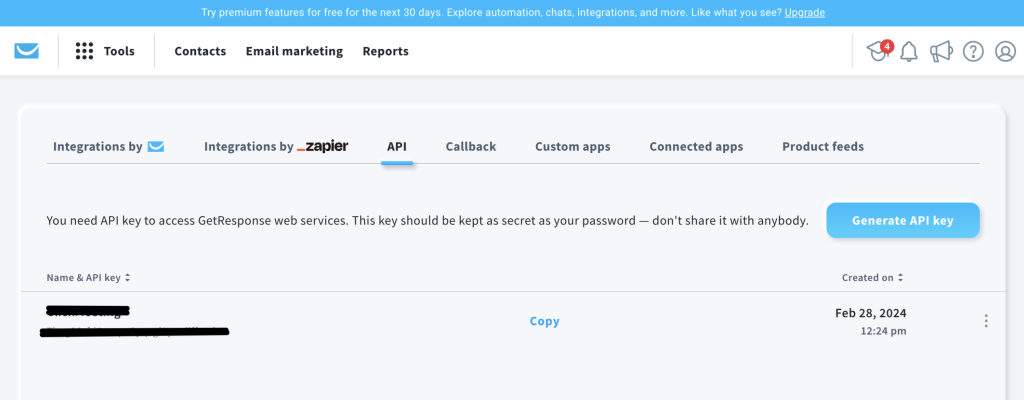
To get started, go to your GetResponse account, click Integrations & API in the upper right corner of your dashboard.
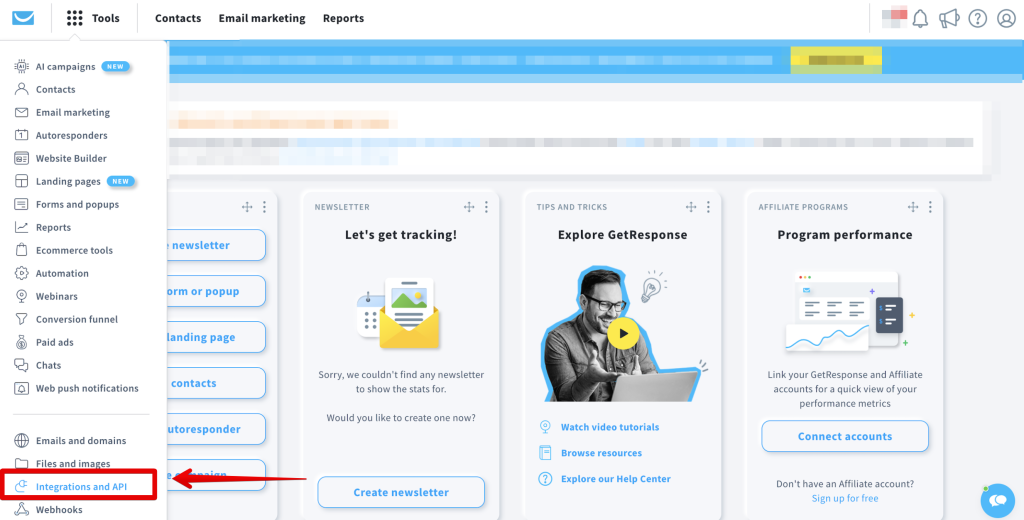
Select API and copy your Default API key.
Now log in to your ClickMeeting account and go to your Account Settings in the upper right corner of your account panel.

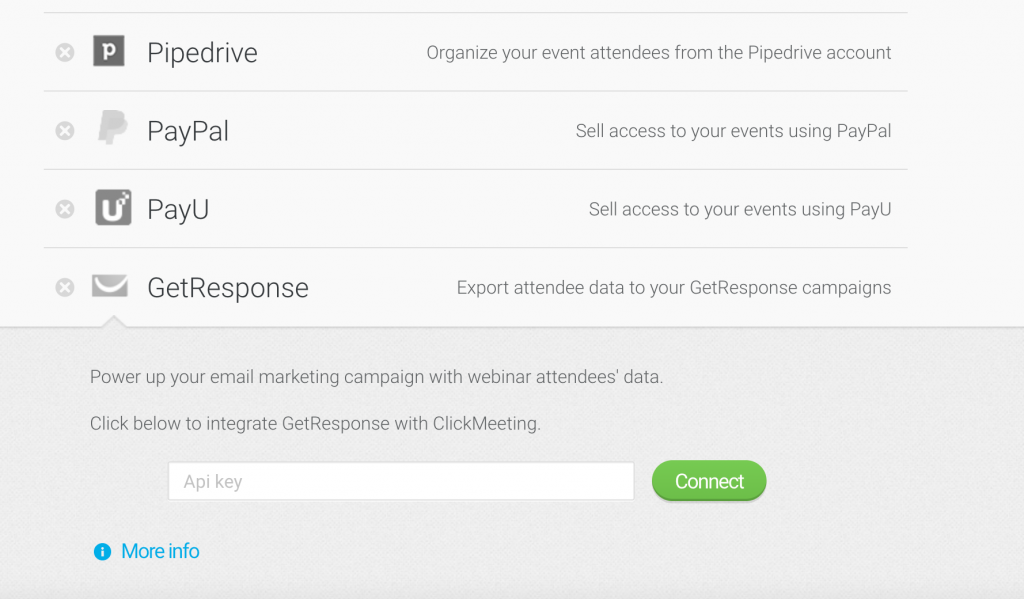
Enter the Integrations tab, select GetResponse and paste the API key copied from GetResponse and click Connect.
The integration works in two ways.
1.Webinar with enabled registration
After a webinar with registration enabled and the GetReponse campaign selected, you will see the registrant’s name and email address below your listings in GetResponse.
Please make sure you enable registration before selecting a GetResponse campaign.
2.Webinar without registration.
After the webinar without registration and with a GetReponse campaign selected, you will see the name and email address of the attendee who joined the event under your GetResponse Lists.
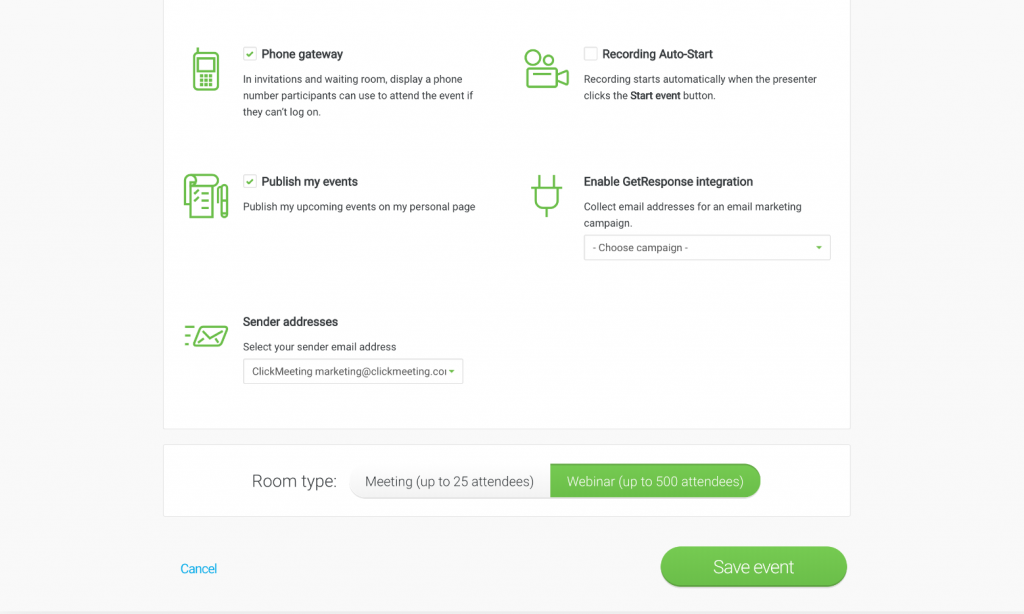
To enable the GetResponse integration, and choose a campaign into which you want to import email addresses, when creating an event, please go to Automation settings and scroll down to Basic settings.
HubSpot
Organize your contacts. HubSpot will build and develop your contact lists.
ClickMeeting automatically exports attendee and registrants data to your HubSpot account. Sort contact lists by meeting name or webinar room name.
How does it work?
Select Account Settings in the upper right corner of your account panel.

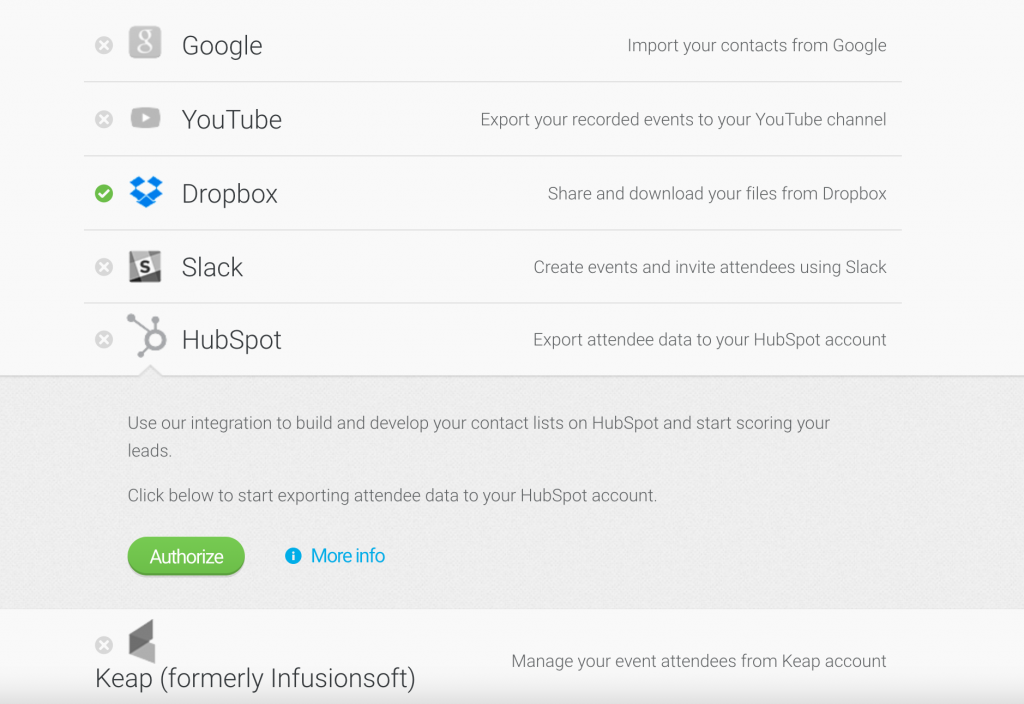
Enter the Integrations tab, choose HubSpot integration, click Authorize, and provide your credentials to connect with your HubSpot account. Once submitted, your integration will be ready.
Create an event with registration and your registrants will be automatically added to the Registered list in your HubSpot account.
If manual confirmation of the registration is enabled, both confirmed attendees and those still awaiting confirmation will be added to the list in HubSpot.
When your event ends, you will see two additional lists:
- Attended for those who participated in your event,
- Registered not attended for those who completed the registration form but did not participate in your event.
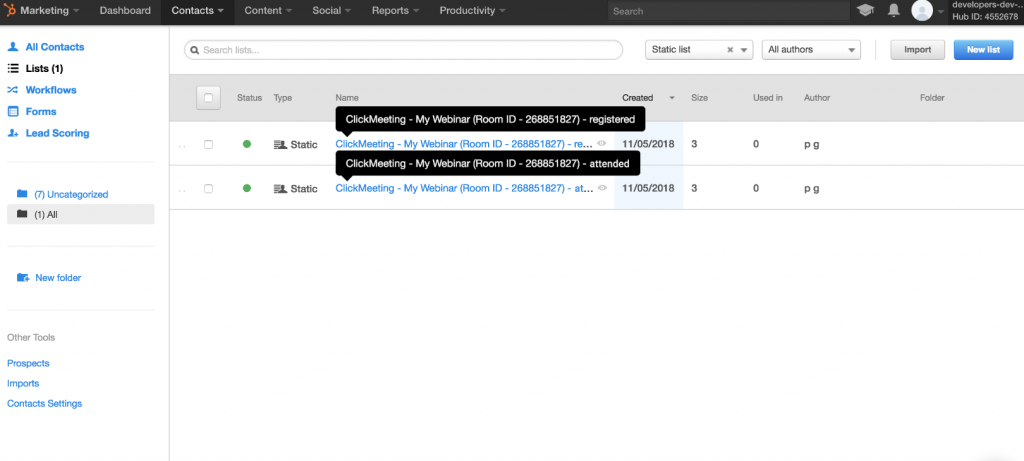
Just bear in mind that event without registration will create only one exported list – Attended, with participants.
Contacts in HubSpot are not duplicated, meaning that contacts already existing in HubSpot will not be visible on the lists.
Now you can adjust follow-up communication to each group and make it more personalized.
Zapier
Revolutionize your entire process of running webinars. Connect it with dozens of sales, marketing, and project management activities. Use Zapier to integrate your ClickMeeting account with 1,500 possible applications and save your time like never before!
Forget about multiplying your work to promote your webinar and about hours spent on scheduling and running plenty of actions after the webinar is over.
With Zapier integration, you can automatically trigger a set of actions to get more people to join your webinar and follow them up after the event.
Here are some creative ways to use ClickMeeting with Zapier:
- Creating a new event automatically launches its promotion on Facebook, Twitter, LinkedIn, Messenger, and remarketing ads.
- Every new webinar attendee will receive an e-mail with exclusive, valuable resources.
- Every new webinar registrant will be automatically exported to your CRM account.
What’s even more exciting – you can make the most of integrating webinars with Zapier by creating YOUR OWN sequences of triggers and actions.
How does it work?
Create your account in ZAPIER
Then return to your ClickMeeting account panel and go to your Account Settings.
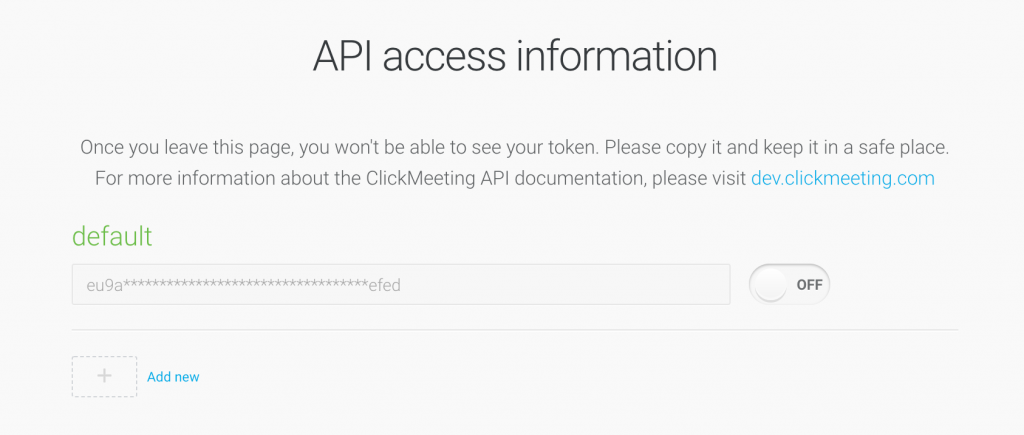
Next, in your Zapier account create a Zap with ClickMeeting. Paste the API KEY there.
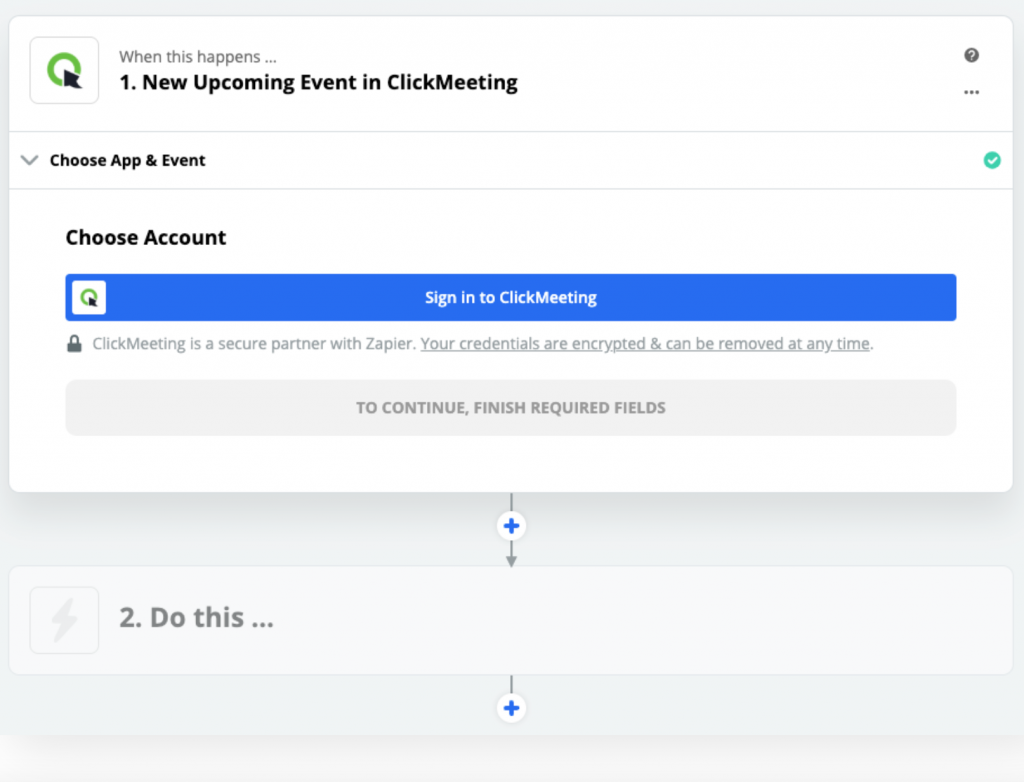
In the API tab copy the API KEY for Zapier.
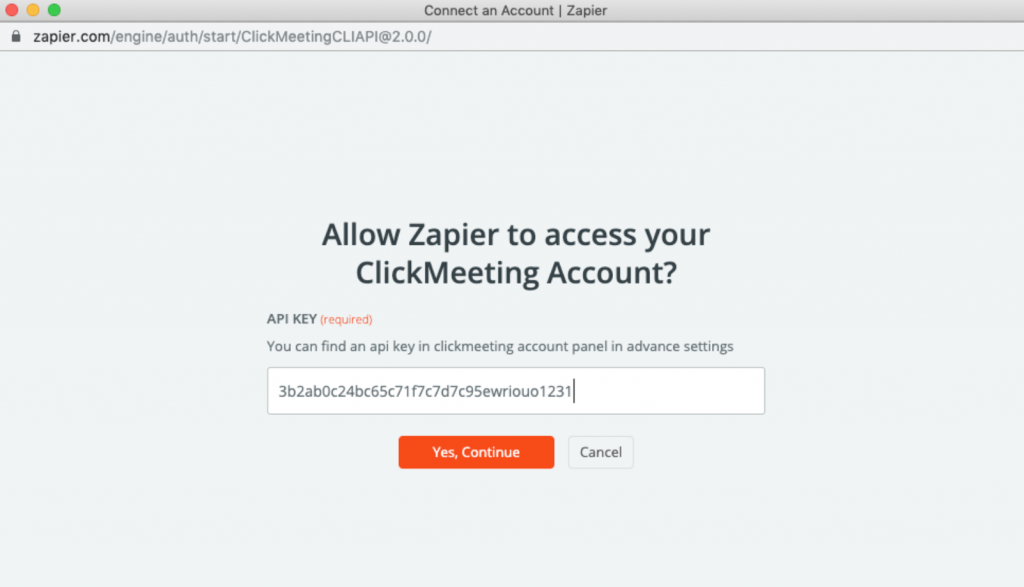
As soon as your ClickMeeting account is integrated with Zapier, you can:
- create and configure Zaps from your Zapier Dashboard,
- go to your Account Settings in ClickMeeting and find our Zap templates embedded in the Integrations tab.
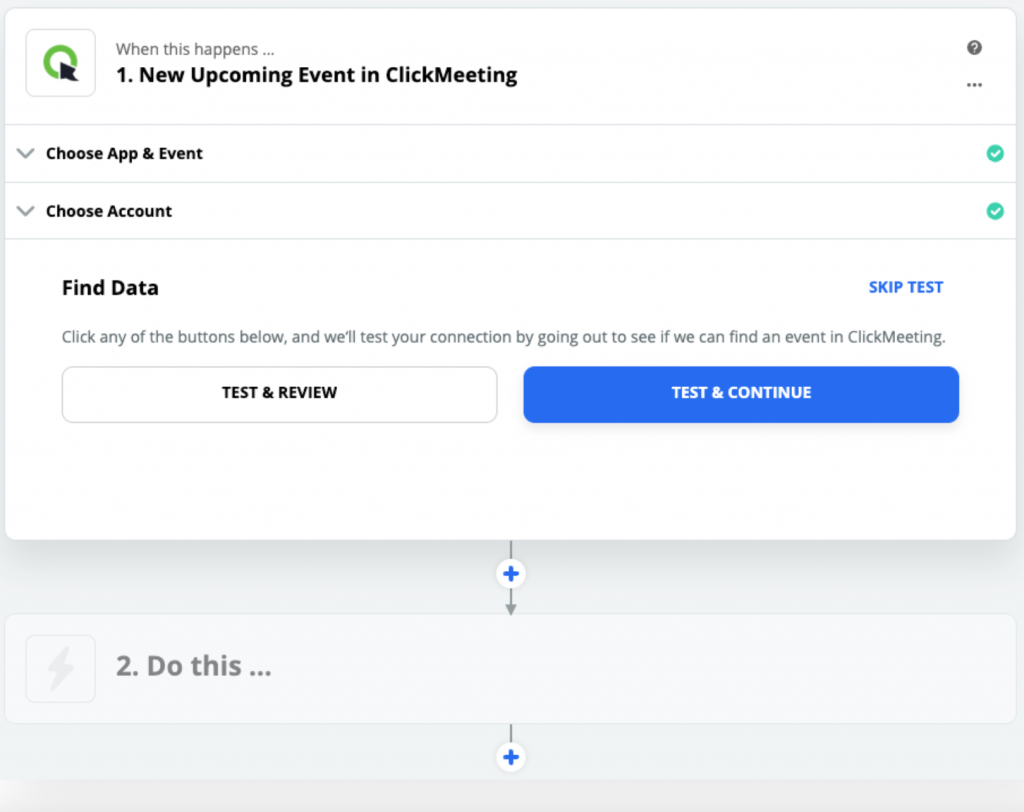
Create your own Zap:
- Add new ClickMeeting webinar registrants to HubSpot contact lists – Use this Zap
- Add new ClickMeeting webinar attendee to your HubSpot contact lists – Use this Zap
- Add new ClickMeeting webinar registrants as new persons in Pipedrive – Use this Zap
- Add new ClickMeeting webinar attendees as new persons in Pipedrive – Use this Zap
- Send direct messages about new ClickMeeting webinars to your contacts on Facebook Messenger – use this Zap
- Send Tweets about new ClickMeeting webinars – Use this Zap
- Send direct messages about new ClickMeeting webinars to your contacts on Slack – Use this Zap
- Send direct messages about new ClickMeeting webinars to a channel on Slack – Use this Zap
- Add your new ClickMeeting webinar attendees as subscribers in Mailchimp – Use this Zap
- Add new ClickMeeting webinars as new Google Calendar events – Use this Zap
Not seeing what you’re looking for?
Create from scratch or learn more
Watch the video to learn how to set up and use the integration:
Google Analytics
Know more. Google Analytics will collect valuable data on your audiences’ behaviour.
Track your audiences’ behaviour with Google Analytics – from your registration form, through the waiting room, to the thank-you page. It will help you in improving your webinar performance.
Google Analytics tracking code will be implemented on the following ClickMeeting pages:
- Profile page
- Registration form
- Login page
- Waiting room
- Thank-you page
Track all webinar processes to know more about prospect registrants, actual registrants and attendees. You can also measure the traffic sources, and visitor data such as their device and location.
For an event with registration enabled, the following events will be reported:
– form_start – start of form filling (with Enhanced measurement enabled).
– form_submit – form sent – also in error, therefore not equal to registration (with Enhanced measurement enabled)
– registration_success – successful webinar registration
All this information will be automatically collected in your Google Analytics account.
How does it work?
STEP 1. Select Account Settings in the upper right corner of your account panel.

STEP 2. Click tab Advanced settings.

STEP 3. Scroll down to the ‘Events on your profile page’ section and copy your unique https address.
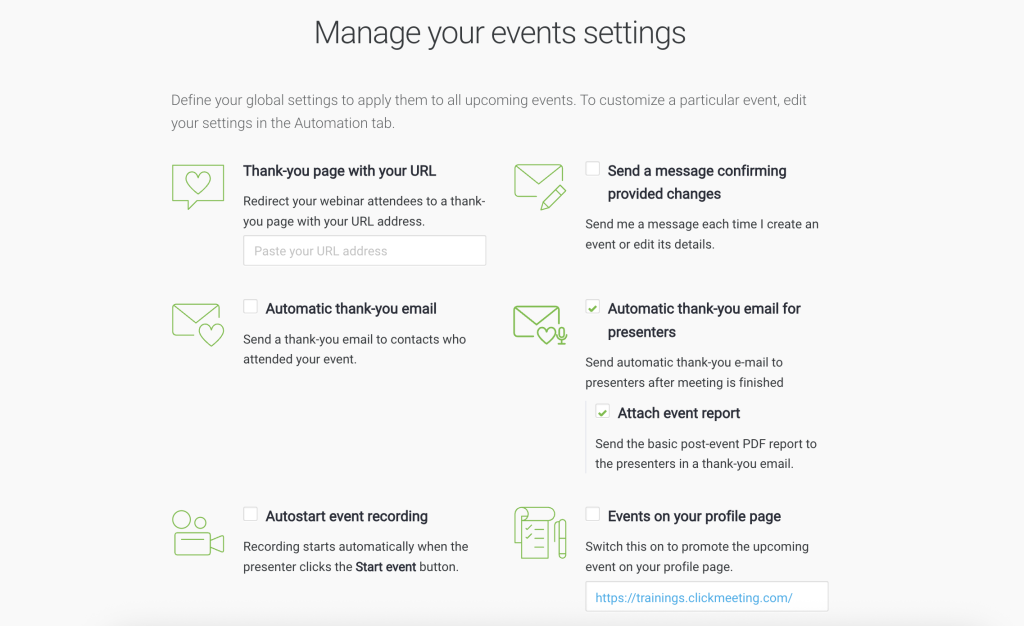
STEP 4. Log in to your Google Analytics 4 account and go to Settings.
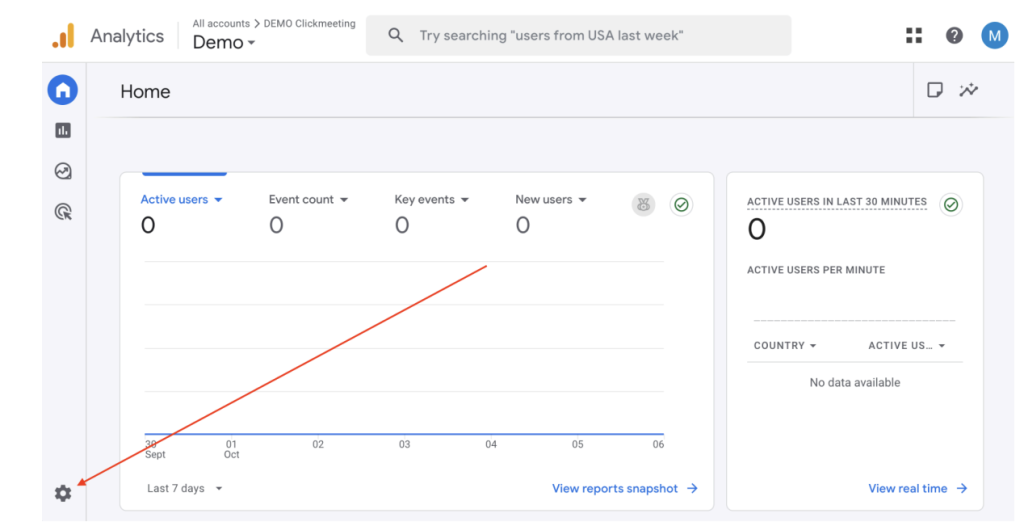
STEP 5. Choose ‘Data collection and modification > Data streams’ and next ‘Add stream’.
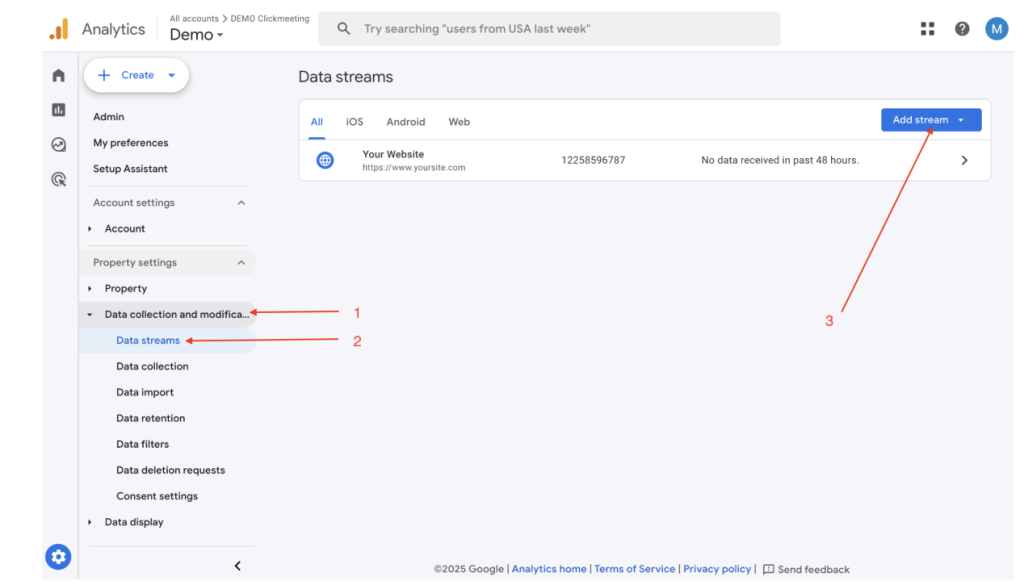
STEP 6. Create New Web Stream.

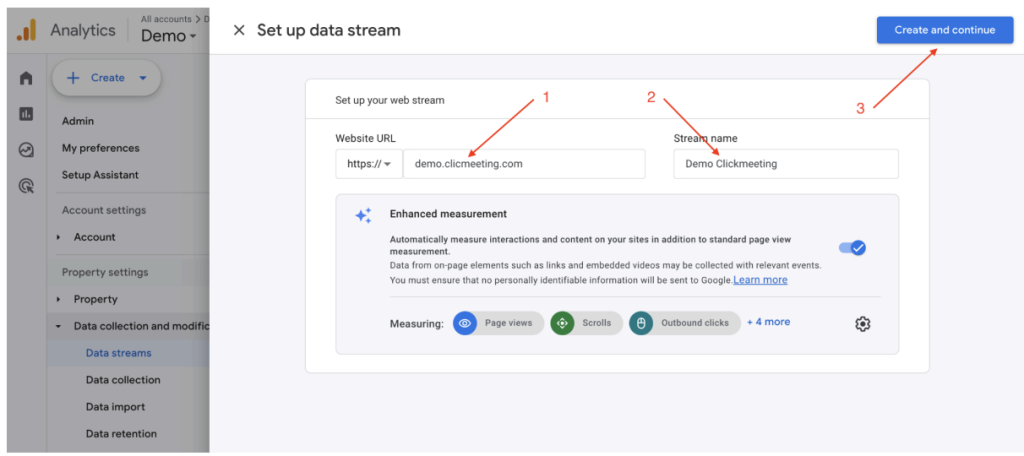
STEP 7. Paste your unique https address (1), type your Stream name (eq. Clickmeeting) and click ‘Create and continue’.
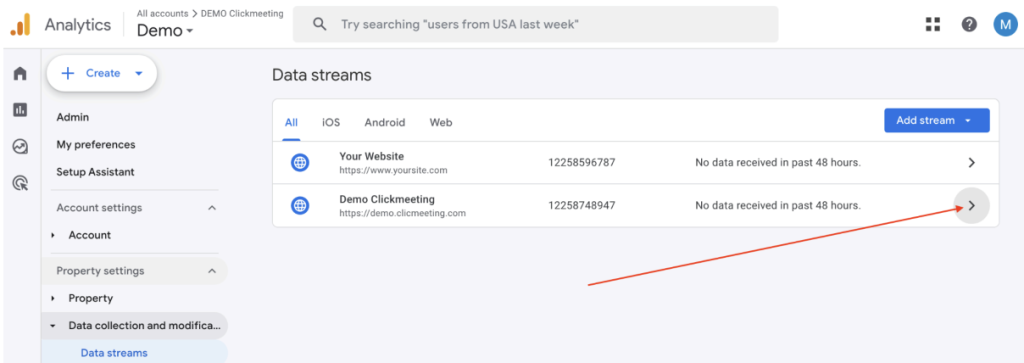
STEP 8. Go to newly created Stream and copy MEASURMENT ID here.
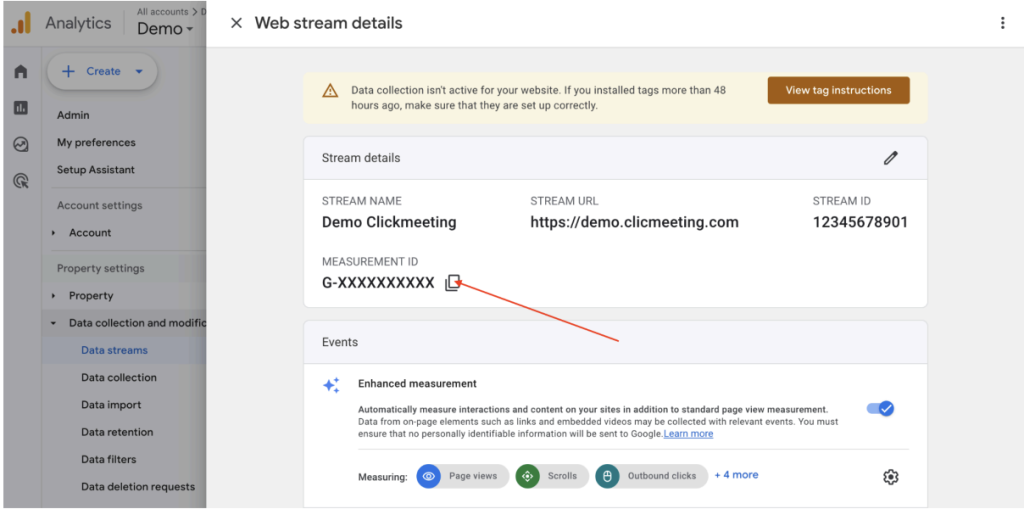
STEP 9. Go back to your Clickmeeting Account Panel. Enter the Integrations tab, select Google Analytics integration from the Analytics and remarketing list, paste your Google Analytics 4 Measurement ID and click Connect. Double check whether the code you pasted is correct.
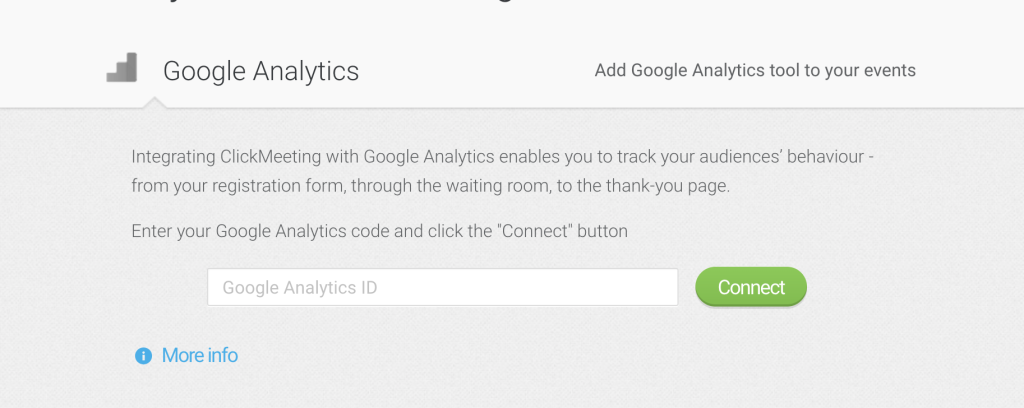
The integration is enabled so you can start collecting webinar data and measure your performance easily.
This integration is available for all pricing plans.
Use our unique guide to learn how to integrate your ClickMeeting account with Google Analytics.
Under certain laws, especially in the European Economic Area and the UK, the use of this feature requires that you are responsible for providing certain privacy notices to and/or obtaining legally valid consents from end users.
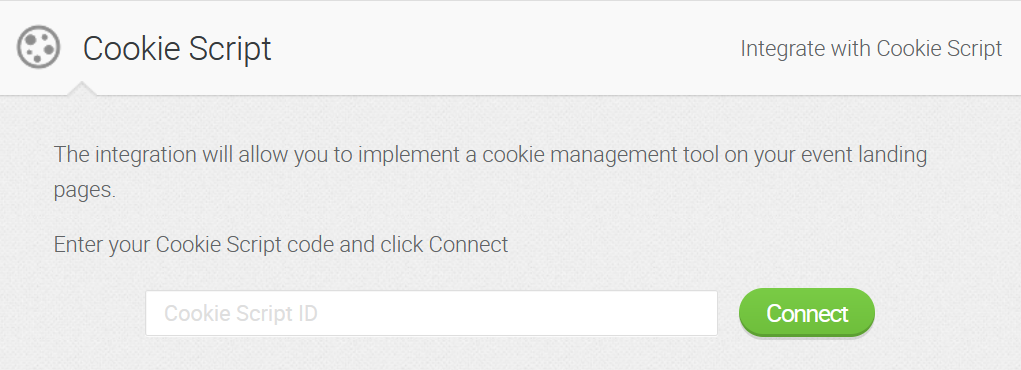
To do so, we encourage you to use our integration with the cookie consent management tool, which we describe in more detail here.
Now, keep your eye on the obtained data and adjust your strategy!
With such insight, it’s really easy.
Meta Pixel (formerly Facebook Pixel)
Get more data. Track your attendees with Meta Pixel and target them effectively with Facebook remarketing ads.
Meta Pixel will provide you with more information about your audience’s actions on ClickMeeting pages. Use that to run more effective remarketing campaigns.
Meta Pixel tracking code will be implemented on all of your ClickMeeting pages:
- Profile page
- Registration form
- Login page
- Waiting room
- Thank-you page
How does it work?
Select Account Settings in the upper right corner of your account panel.

Enter the Integrations tab, select Meta Pixel, enter your Meta Pixel ID and click Connect.
This integration is available for all pricing plans.
Under certain laws, especially in the European Economic Area and the UK, the use of this feature requires that you are responsible for providing certain privacy notices to and/or obtaining legally valid consents from end users.
To do so, we encourage you to use our integration with the cookie consent management tool, which we describe in more detail here.
LinkedIn Insight
Track your attendees using LinkedIn Insight integration. Learn more here.
Where can I find my LinkedIn Partner ID? – Click here.
Where can I find my LinkedIn Conversion ID? – Click here.

TikTok Pixel
Track your attendees using TikTok Pixel integration. Target your attendees effectively with your TikTok remarketing ads. Learn more here.
YouTube
Impress your audience and make your events more effective by presenting video content directly from YouTube.
YouTube enables to play any video content during the event. You can also export your recorded webinar directly to your YouTube channel.
How does it work?
Select YouTube from the menu on the left in your webinar room, paste a URL from YouTube into the searchbox and click OK.
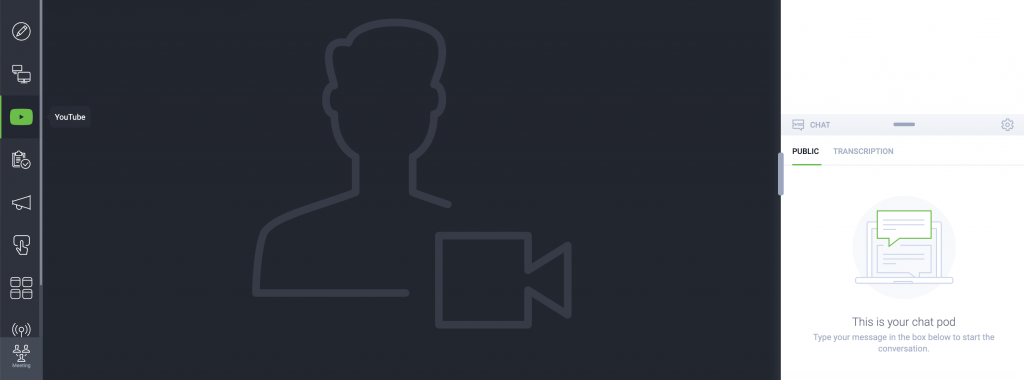
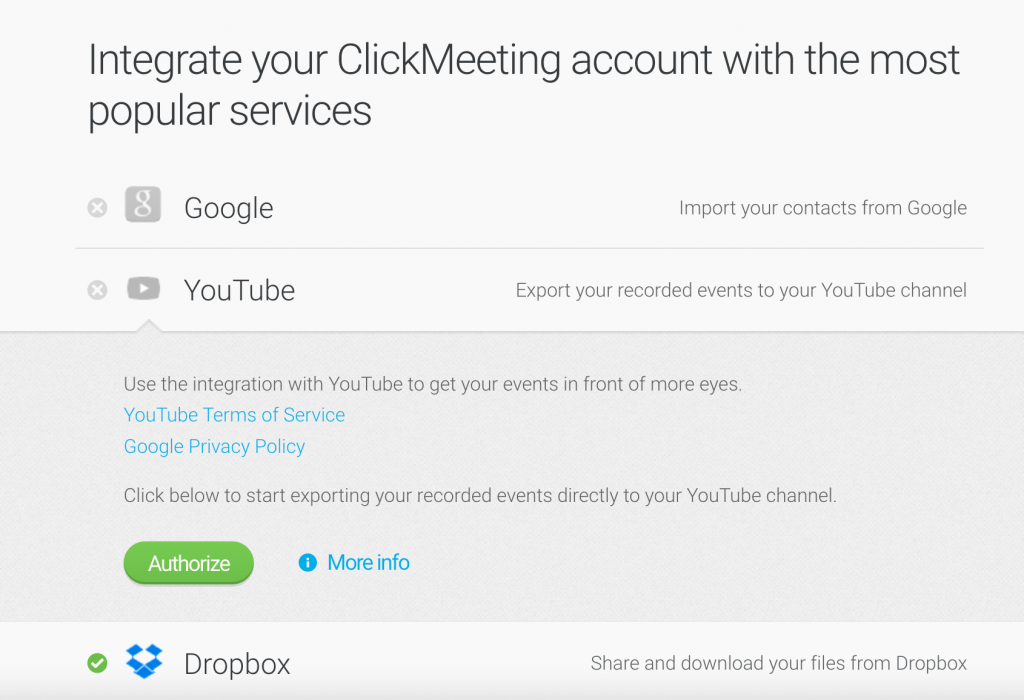
To enable exporting your recorded webinar directly to YouTube, log into ClickMeeting account and go to your Account Settings in the upper right corner of your account panel.

Enter the Integrations tab, choose YouTube integration and click Authorize. You’ll be asked to provide your YouTube credentials. Once you submit it, your integration will be enabled.
To export your recorded webinar, go to your Storage tab in your account panel and choose Recordings.
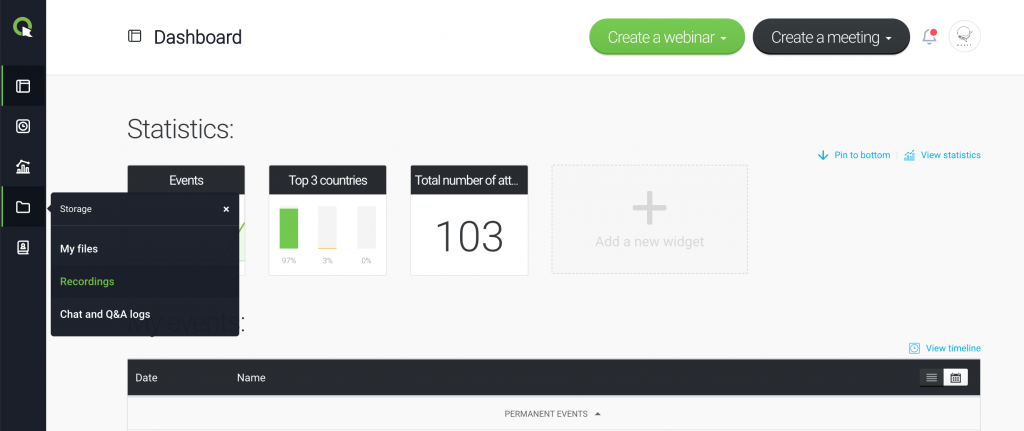
Click Actions next to the recording you’d like to export and then click YouTube. Your file will be automatically exported to your YouTube channel.
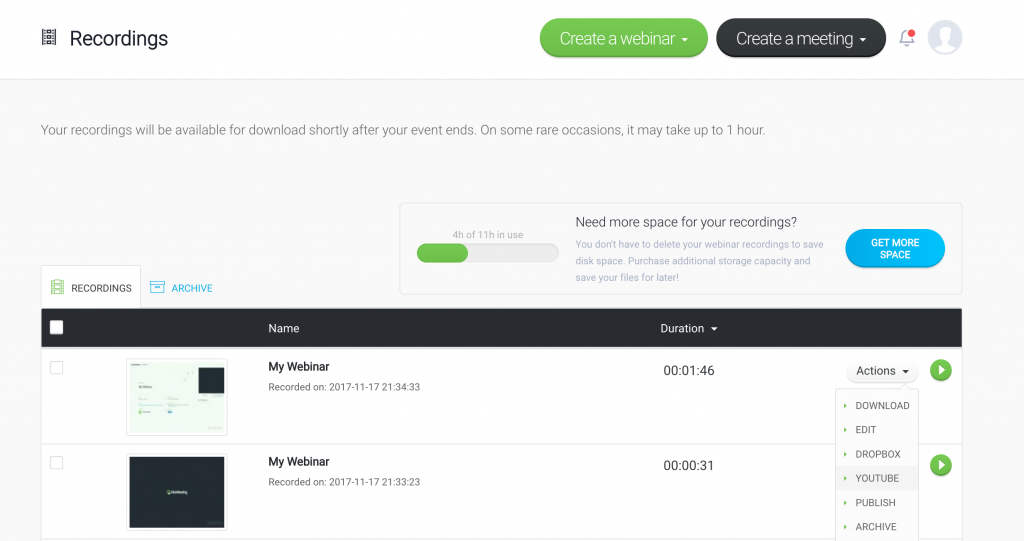
Bear in mind that by default your recording will be published as a private video, not visible to your subscribers. To make it public, go to the Video Manager Tab in your YouTube account, and click the Lock icon by the video. Below the thumbnail you’ll find the Basic info on the uploaded video. This is where you can change it from private to public.
If you’re unable to integrate ClickMeeting with YouTube, it means you’re using the old version of your Google/Gmail account, and your YouTube channel is not active.
You’ll be asked to activate your YouTube channel. To learn how, visit the Google Help Center.
Dropbox
Manage and share your files with Dropbox integration and run your events in a smooth and engaging way.
Dropbox integration lets you seamlessly upload files to your ClickMeeting account and share them during events. You can also export webinar recordings directly to your Dropbox.
How does it work?
Select Account Settings in the upper right corner of your account panel.

Enter the Integrations tab, choose Dropbox integration and click Authorize. You’ll be asked to provide your Dropbox login and password. Once you submit it, your integration will be enabled.
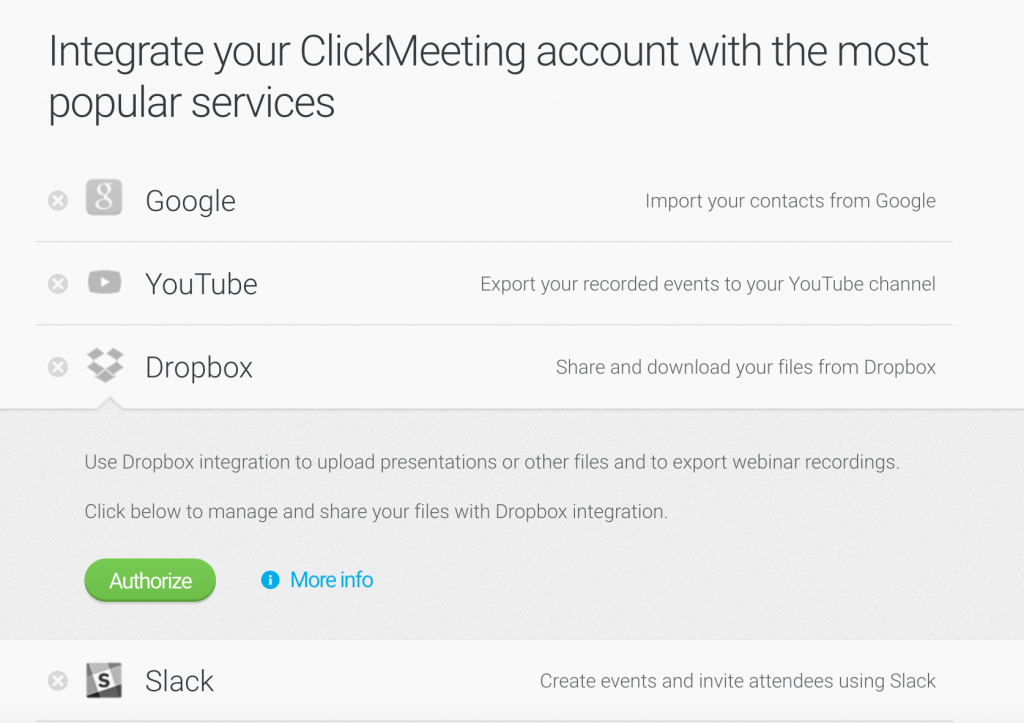
To import files from Dropbox to ClickMeeting go to the Storage tab, choose Presentations and click the Import from Dropbox button. Then select files to upload to your Storage.
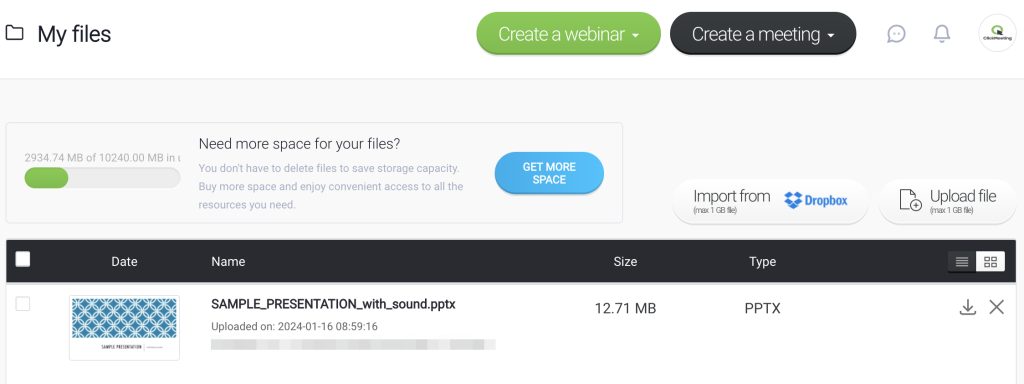
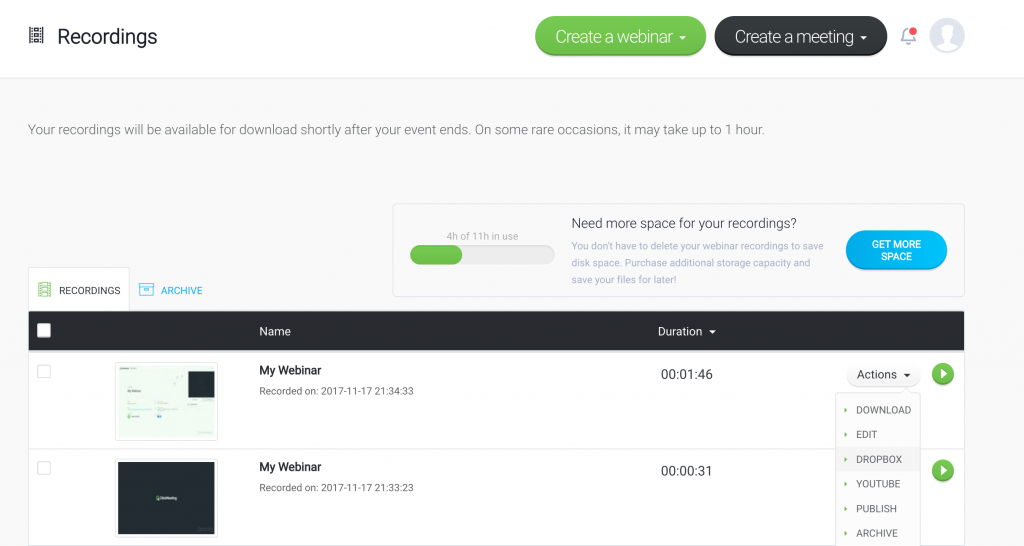
To export recordings from ClickMeeting to your Dropbox, log into your account panel, select the Storage tab, and choose Recordings.

Click Actions next to the file you want to export and choose Dropbox. Your recording will be automatically exported to your Dropbox account.
Now you don’t have to worry about uploading! Focus on your webinar instead.
Google Calendar
Make sure your attendees can add your event to their calendars. Don’t let them miss the event.
Google Calendar enables your invitees to easily save information about the event on their default calendars.
How does it work?
Create an event and send out the invitations. As people accept your invitation, they will have an option to automatically add the event into their calendars.

Your invitees will effortlessly remember about your event. And can win you more attendees!
iCal
iCal enables your invitees to automatically save information about the event on their calendars.
How does it work?
Create an event and send out the invitations. As people accept your invitation, they will have an option to automatically add the event into their calendars.
Outlook
Save time and effort by scheduling your events from Outlook.
Outlook is a convenient workspace for managing your email and setting up in-person meetings. Use the plug-in to create an event and invite attendees directly from Outlook.
Click here to learn how to enable and use the integration.
Slack
Don’t have time? Run and manage your online events directly from Slack.
With Slack integration create an ad-hoc event or a scheduled one quickly and easily! The event you’ll create in Slack will be automatically added to your ClickMeeting account.
How does it work?
Select Account Settings in the upper right corner of your account panel.

Enter the Integrations tab, choose Slack integration, click Authorize.
