On-demand webinars
What is the difference between live and On-Demand Webinars?
Live webinars are those events conducted in the real-time, with a host/organizer present in the webinar room. The On-Demand Webinar is a form of a pre-recorded webinar that is created with components prior to publishing. As soon as your participants receive an email invitation, they have unlimited access to it. They can join your event whenever and wherever they want.
How do I set up an On-Demand Webinar?
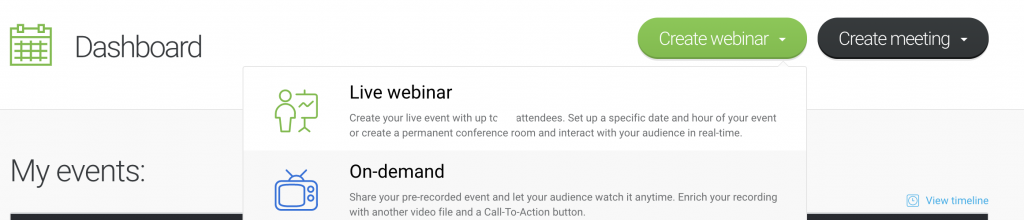
Log in to your account, click Create a webinar, then choose On-Demand. Enter the room name and decide on the Access Type.
Then choose the components you would like to add to your webinar – a pre-recorded video, presentation or 3rd party program recordings, or a custom Call-To-Action button. Make sure all the components are ready in advance!
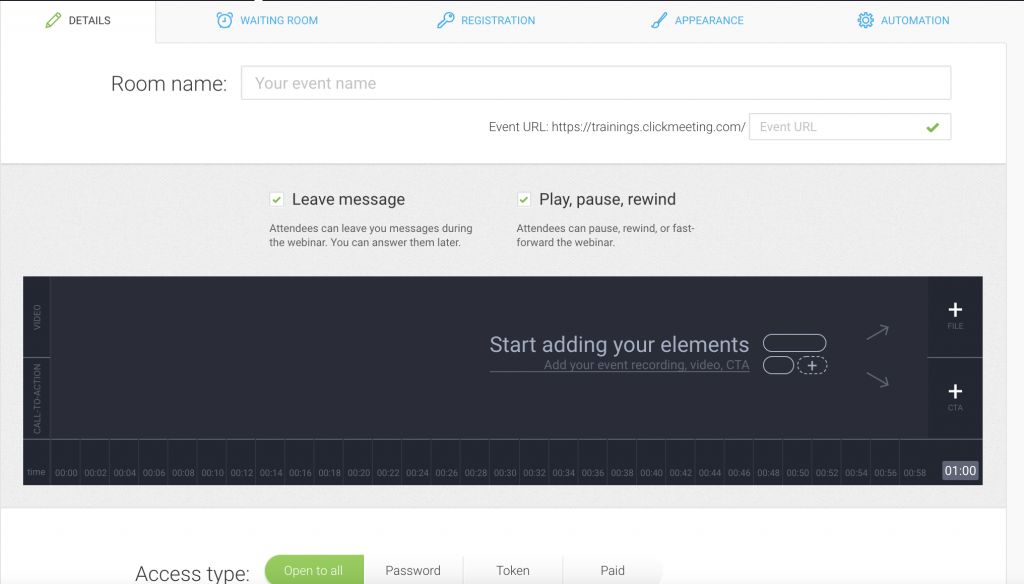
You can enable scroll controls for your event and an option for the participants to leave you a message if needed.
Paid on-demand webinars have the option to set up additional security for them.

If you select the option – Secure the event with a one-time use token – after paying for access to the event, the attendees will follow those steps.
1. They will receive a payment confirmation message with a link to the webinar.
2. They click the Watch Now button or paste the link into their browser.
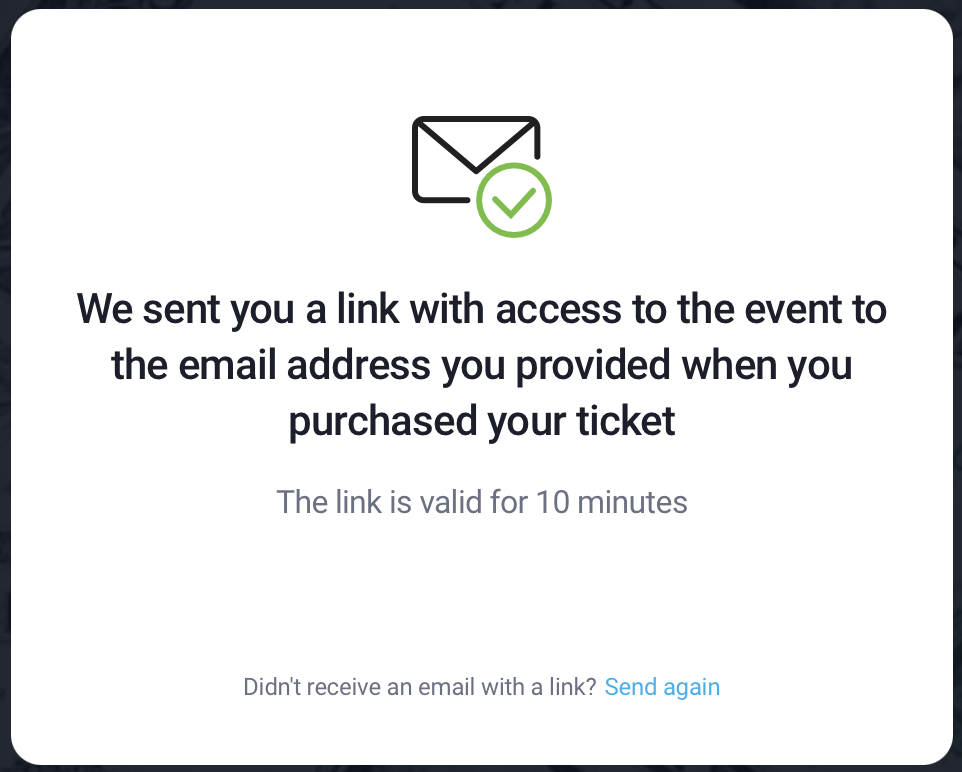
3. They see a message about a unique access being sent to them – a link valid for 10 minutes (a re-sending of the unique access link can be triggered if necessary).
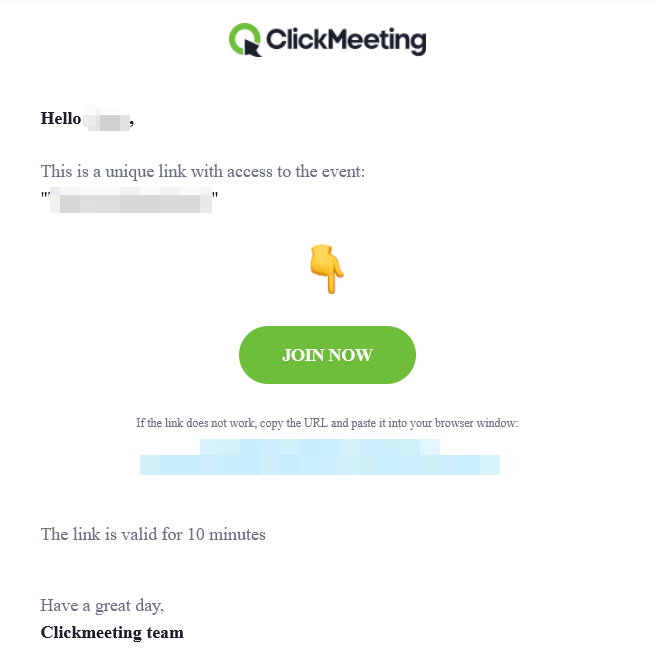
4. They receive a message with a unique link with short-term access and from this message they can start watching the webinar on demand.
Free Preview of Paid On-demand Webinar (PayWall)
In the on-demand webinar settings, you can set up a free preview of the recording that will be available to all participants. To access the full version of the recording, a ticket must be purchased.
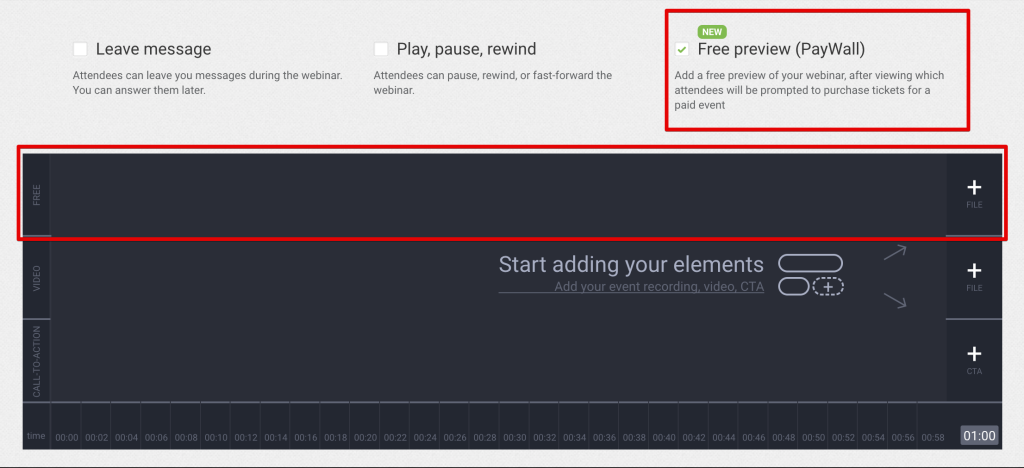
To do this, click Create Webinar and choose On-demand. Set the event access type to Paid. Then, check the Free Preview (PayWall) option. On the on-demand event timeline, in the Free section, add a file that will be available for free viewing by clicking the plus icon.
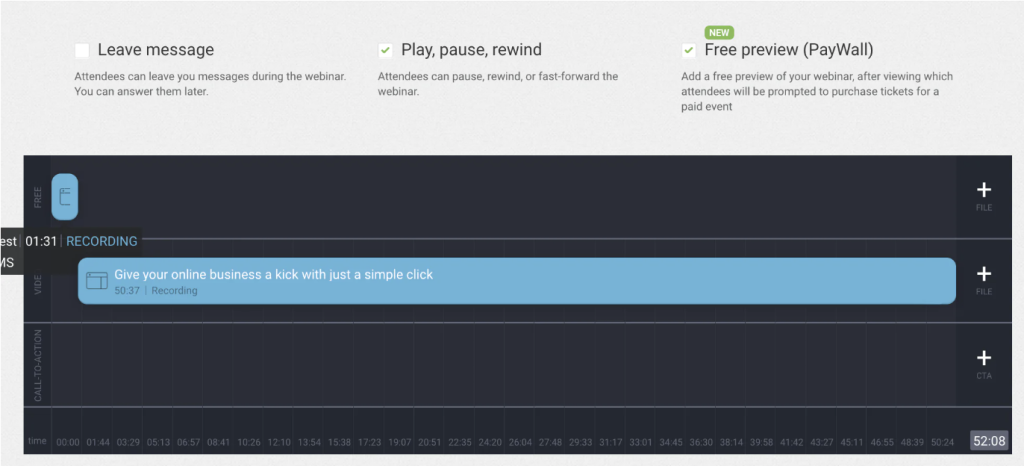
Next, add a file to the Video section using the plus icon as well. This material can only be played by participants after they have paid for the event.
A paid on-demand event with the free preview enabled always has registration enabled. You can edit this page from the Paid tab in the event creation path.
Remember, for such a webinar, you can also set up promo codes.
How does access to a paid on-demand event with a free preview look from the participant’s perspective?
After completing the registration form, the participant receives a confirmation email with a link to access the event. When they click the link, they will see the file that was added as a free preview. After finishing this video, the participant will be redirected to a page where they can pay for access. If the transaction is successful, the participant will receive a confirmation email with a link to the rest of the event.
How can I check participants who have paid for full access?
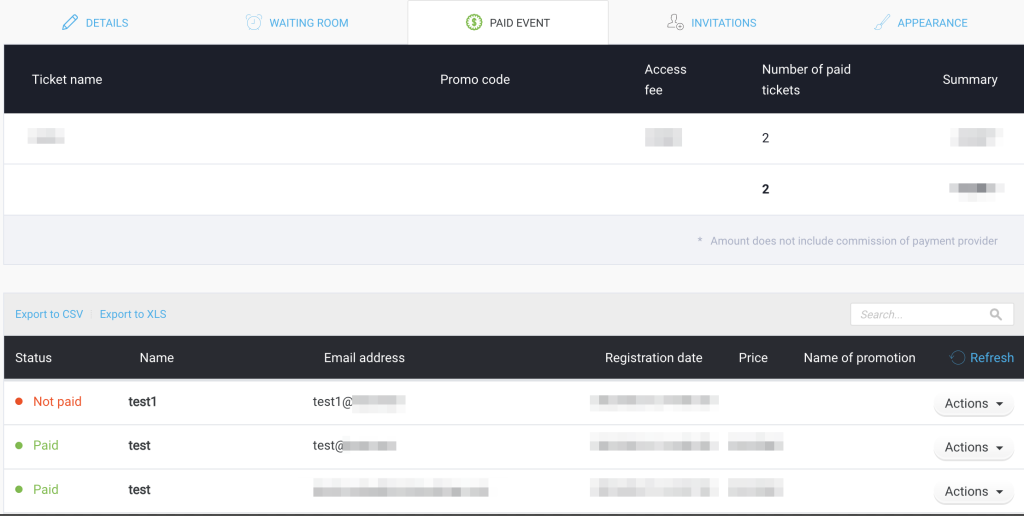
Find the event in your account panel and click on the event name. Then, go to the Paid Event tab. Next to the participants who have paid for access, you will see the Paid status.
How can I check participants who have registered but not paid?
Find the event in your account panel and click on the event name. Then, go to the Paid Event tab. Next to the participants who have not paid for access, you will see the Unpaid status.
Where can I check the list of leads of my On-Demand Webinar?
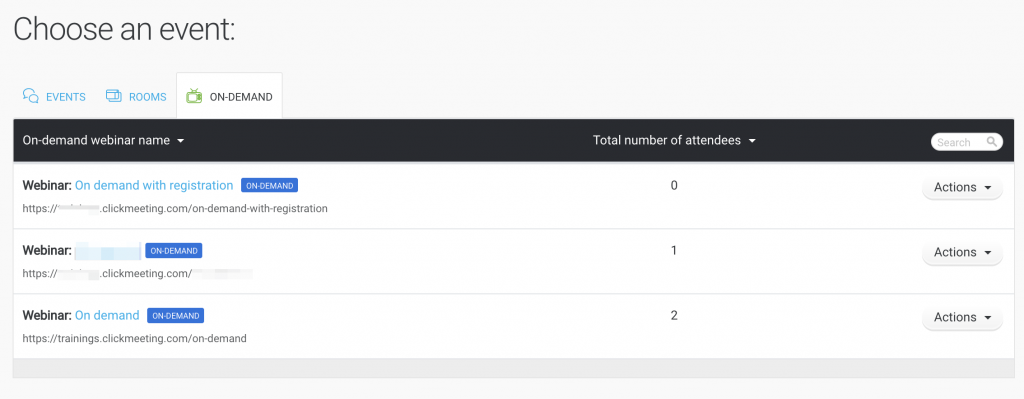
Click on Statistics in the upper right corner of Account Panel. Choose the “on-demand events” tab. You will see a list of your webinars along with the number of unique attendees.
By clicking on Actions and then View details you will get a list of viewers with all of their details. The messages left by viewers will be available in that section as well.
How do I secure my on-demand webinars?
You get 3 options to choose from:
- password protection: each person who has received the event URL and password can access the webinar;
- token protection: attendees can access your on-demand webinar anytime and can watch it as many times as they want. A token is required to access the webinar;
- one-time token protection: each such token provides an attendee with a 24h access to your on-demand webinar. Closing/changing the browser will make the token inactive.
Paid on-demand webinars also allow you to use one-time use tokens.
If you select the option – Secure the event with a one-time use token – after paying for access to the event, the attendees will follow those steps.
1. They will receive a payment confirmation message with a link to the webinar.
2. They click the Watch Now button or paste the link into their browser.
3. They see a message about a unique access being sent to them – a link valid for 10 minutes (a re-sending of the unique access link can be triggered if necessary).
4. They receive a message with a unique link with short-term access and from this message they can start watching the webinar on demand.